Previous: Install Oracle Identity and Access Management Components
Database Patches
1. PSU 11.2.0.3.4
This patch is already applied as part of database installation
2. Apply other database patches
[fusion@fmwhost patch]$ /app/fusion/database/product/11.2.0/dbhome_1/OPatch/opatch napply
All the patches are already installed as part of database creation using provisioning wizard.
The following patch(es) are already installed in the Oracle Home.
[10263668 11837095 12312133 12317925 12646746 12772404 12889054 12977501 12985184 13014128 13078786 13365700 13404129 13454210 13508115 13615767 13632653 13714926 13743987 13787482 13790109 13918644 14013094 14029429 14058884 14110275 14143796 14164849 14207317 14226599 14499293 14653598 14679292 14698700 14725518 14743385 14793168 14840138 15832953 15885799]
Please roll back the existing identical patch(es) first.
Weblogic Server Patches
We have 2 options to apply Weblogic patches. Here is the first method using GUI.
[fusion@fmwhost weblogic]$ mkdir /app/fusion/fmw/utils/bsu/cache_dir/
[fusion@fmwhost weblogic]$ pwd
/mnt/hgfs/setup/installers/smart_update/weblogic
[fusion@fmwhost weblogic]$ cp -pr *.jar /app/fusion/fmw/utils/bsu/cache_dir/
[fusion@fmwhost weblogic]$ cp -pr *.xml /app/fusion/fmw/utils/bsu/cache_dir/
Start Weblogic Smart Update using bsu command at <MW_HOME>/utils/bsu location
[fusion@fmwhost weblogic]$ cd /app/fusion/fmw/utils/bsu/
[fusion@fmwhost bsu]$ ./bsu.sh
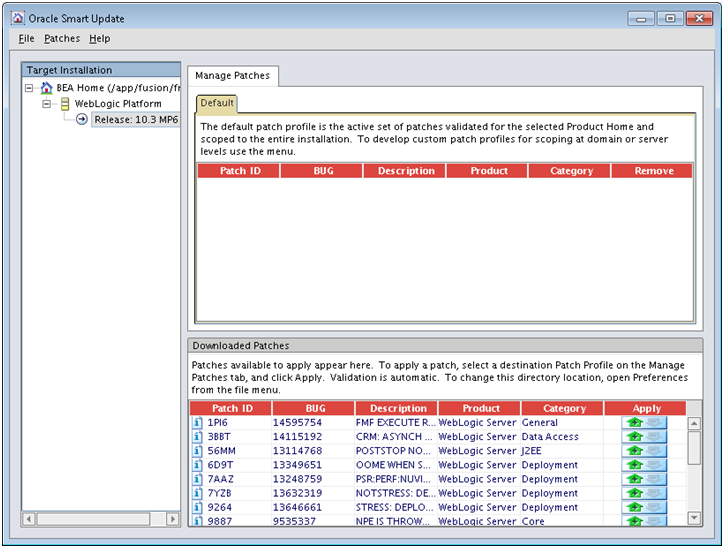
Click on the green icon under Apply column for each of the patch to validate and apply the same.
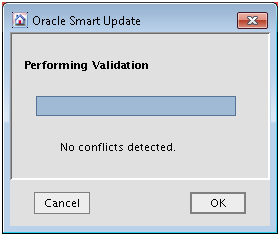
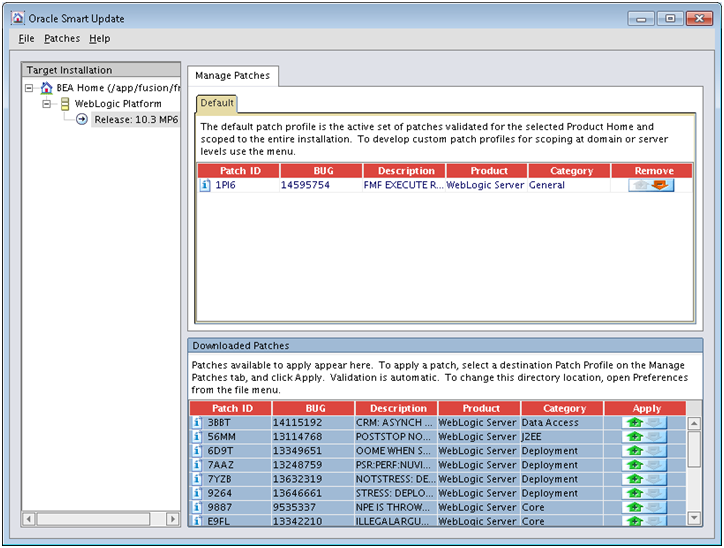
Do the same for all other patches.
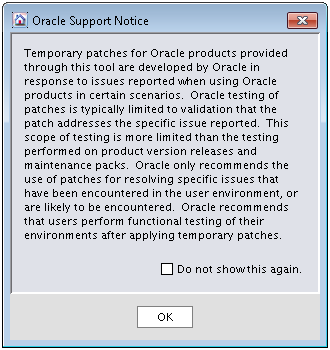
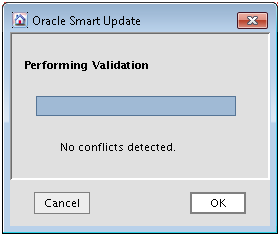
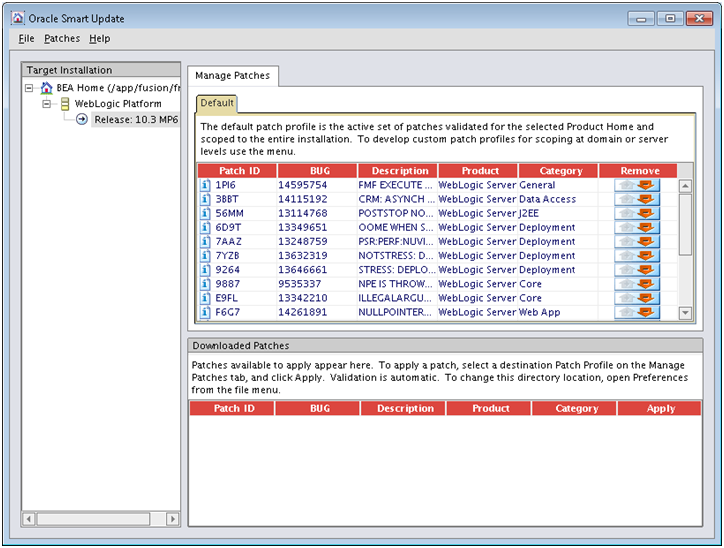
Once you see above screen, it means all patches are successfully applied to Weblogic.
Or alternatively we can use following method
The WebLogic server patches are available under the FA Repository/installers/smart_update/weblogic directory. Follow the patch Readme and apply all the patches in the directory. Use the following command to apply all the patches:
java -jar FA Repository/installers/smart_update/suwrapper/bsu-wrapper.jar \
-bsu_home=/bea/mw_home/utils/bsu -meta=./suw_metadata.txt -install \
-patchlist=<WLS Patch List>\
-patch_download_dir=FA Repository/installers/smart_update/weblogic\ -prod_dir=/u01/oim/wlserver_10.3
For the WLS Patch List, provide a comma-separated list of WLS patches from the
following directory in the FA Repository: FA Repository/installers/smart_
update/weblogic
IDM Patches
[fusion@fmwhost bsu]$ cd /mnt/hgfs/setup/installers/pltsec/patch/
[fusion@fmwhost patch]$ ls -ltr
total 0
drwxrwxrwx 1 root root 0 Jan 2 2012 13531666
drwxrwxrwx 1 root root 0 May 11 2012 14034245
drwxrwxrwx 1 root root 0 Jun 27 2012 14249414
drwxrwxrwx 1 root root 0 Oct 9 03:18 14735846
drwxrwxrwx 1 root root 0 Oct 16 12:49 14726667
[fusion@fmwhost patch]$ export ORACLE_HOME=/app/fusion/fmw/idm
[fusion@fmwhost patch]$ $ORACLE_HOME/OPatch/opatch napply
OPatch detects the Middleware Home as “/app/fusion/fmw”
Invoking utility “napply”
Checking conflict among patches…
Conflicts/Supersets for each patch are:
Patch : 14249414
Bug SubSet of 14735846
Subset bugs are:
14203797, 14177175
Patch : 14735846
Bug Superset of 14249414
Super set bugs are:
14203797, 14177175
Skip these patches because they are subset of other patches in the list: 14249414
Proceed with these patches: 13531666 14034245 14726667 14735846
Checking if Oracle Home has components required by patches…
Running prerequisite checks…
Checking conflicts against Oracle Home…
OPatch found that the following patches are not required.
They are either subset of the patches in Oracle Home (or) subset of the patches in the given list
(or) duplicate :
14249414
OPatch continues with these patches: 13531666 14034245 14726667 14735846
Do you want to proceed? [y|n]
y
User Responded with: Y
OPatch detected non-cluster Oracle Home from the inventory and will patch the local system only.
Please shutdown Oracle instances running out of this ORACLE_HOME on the local system.
(Oracle Home = ‘/app/fusion/fmw/idm’)
Is the local system ready for patching? [y|n]
y
UtilSession: N-Apply done.
——————————————————————————–
The following warnings have occurred during OPatch execution:
1) OUI-67302:
OPatch found that the following patches are not required.
They are either subset of the patches in Oracle Home (or) subset of the patches in the given list
(or) duplicate :
14249414
——————————————————————————–
OPatch Session completed with warnings.
OPatch completed with warnings.
Post step for 14735846
[fusion@fmwhost ~]$ cd /app/fusion/fmw/idm/ldap/admin/
[fusion@fmwhost admin]$ sqlplus ods@fusiondb
spool OID_Patch.txt
@oidtblkl.sql
@oidx11116.sql
@ldapxpkg.sql
[fusion@fmwhost admin]$ ls -ltr OID_Patch.txt
-rw-r–r– 1 fusion dba 425948 Mar 4 15:25 OID_Patch.txt
Patch Common Oracle Homes
[fusion@fmwhost patch]$ cd /mnt/hgfs/setup/installers/oracle_common/patch
[fusion@fmwhost patch]$ export ORACLE_HOME=/app/fusion/fmw/oracle_common
[fusion@fmwhost patch]$ ls -ltr
total 0
drwxrwxrwx 1 root root 0 Dec 22 2011 12556084
drwxrwxrwx 1 root root 0 Feb 3 2012 13639146
drwxrwxrwx 1 root root 0 Feb 13 2012 13713159
drwxrwxrwx 1 root root 0 Feb 13 2012 13713541
drwxrwxrwx 1 root root 0 Feb 16 2012 13511837
drwxrwxrwx 1 root root 0 Mar 2 2012 13805105
drwxrwxrwx 1 root root 0 Mar 8 2012 13807335
drwxrwxrwx 1 root root 0 May 9 2012 14054792
drwxrwxrwx 1 root root 0 May 24 2012 14109342
drwxrwxrwx 1 root root 0 Jul 20 2012 14336421
drwxrwxrwx 1 root root 0 Aug 3 2012 14311636
drwxrwxrwx 1 root root 0 Sep 21 06:49 14656857
drwxrwxrwx 1 root root 0 Oct 15 13:07 14763194
drwxrwxrwx 1 root root 0 Oct 18 00:49 14776651
drwxrwxrwx 1 root root 0 Oct 23 09:28 14740858
drwxrwxrwx 1 root root 0 Nov 7 04:57 15842871
drwxrwxrwx 1 root root 0 Nov 16 03:50 15878911
drwxrwxrwx 1 root root 0 Nov 20 18:01 14781147
drwxrwxrwx 1 root root 0 Nov 29 13:11 15935215
drwxrwxrwx 1 root root 0 Nov 30 03:55 15937259
[fusion@fmwhost patch]$ $ORACLE_HOME/OPatch/opatch napply
…
The local system has been patched and can be restarted.
UtilSession: N-Apply done.
OPatch succeeded.
IAM Patches
[fusion@fmwhost patch]$ cd /mnt/hgfs/setup/installers/idm/patch/
[fusion@fmwhost patch]$ ls -ltr
total 2
drwxrwxrwx 1 root root 4096 Jan 23 2012 13399365
drwxrwxrwx 1 root root 0 Feb 2 2012 13115859
drwxrwxrwx 1 root root 0 Jul 19 2012 14345968
drwxrwxrwx 1 root root 0 Oct 10 07:04 14741964
drwxrwxrwx 1 root root 0 Oct 26 15:33 14810463
drwxrwxrwx 1 root root 0 Nov 12 02:55 15860686
drwxrwxrwx 1 root root 0 Nov 26 06:07 15908418
drwxrwxrwx 1 root root 0 Dec 21 17:12 15903122
drwxrwxrwx 1 root root 0 Dec 21 17:12 15938034
drwxrwxrwx 1 root root 0 Dec 21 17:12 12418680
[fusion@fmwhost patch]$ export ORACLE_HOME=/app/fusion/fmw/iam
[fusion@fmwhost patch]$ $ORACLE_HOME/OPatch/opatch napply
Do you want to proceed? [y|n]
y
…
Is the local system ready for patching? [y|n]
y
…
The local system has been patched and can be restarted.
UtilSession: N-Apply done.
OPatch succeeded.
Post step for 13115859 – not required since we have not yet created any domain
Post step for 15903122 – only for existing Fusion Applications installation
Post step for 15938034 – only for systems using DevOps, remaining environments need not apply this
Post-Patch Instructions for IDM and IAM
Patch SOA
[fusion@fmwhost patch]$ cd /mnt/hgfs/setup/installers/soa/patch/
[fusion@fmwhost patch]$ ls -ltr
total 0
drwxrwxrwx 1 root root 0 Mar 20 2012 13263008
drwxrwxrwx 1 root root 0 Aug 16 2012 14501468
drwxrwxrwx 1 root root 0 Nov 20 18:00 14781147
[fusion@fmwhost patch]$ export ORACLE_HOME=/app/fusion/fmw/SOA
[fusion@fmwhost patch]$ $ORACLE_HOME/OPatch/opatch napply
Do you want to proceed? [y|n]
y
…
The local system has been patched and can be restarted.
UtilSession: N-Apply done.
OPatch succeeded.
Patch OHS/Web
[fusion@fmwhost patch]$ cd /mnt/hgfs/setup/installers/webtier/patch/
[fusion@fmwhost patch]$ export ORACLE_HOME=/app/fusion/fmw/web
[fusion@fmwhost patch]$ ls -ltr
total 0
drwxrwxrwx 1 root root 0 Jul 2 2012 14264658
drwxrwxrwx 1 root root 0 Oct 1 02:00 14695345
[fusion@fmwhost patch]$ $ORACLE_HOME/OPatch/opatch napply
Do you want to proceed? [y|n]
y
…
Is the local system ready for patching? [y|n]
Y
…
The local system has been patched and can be restarted.
UtilSession: N-Apply done.
OPatch succeeded.
Applying Workarounds
Provisioning the OIM Login Modules Under the WebLogic Server Library Directory
Due to issues with versions of the configuration wizard, some environmental variables are not added to the DOMAIN_HOME/bin/setDomainenv.sh script. This causes certain install sequences to fail. This is a temporary workaround for that problem.
1. Copy the files located under the IAM_ORACLE_HOME/server/loginmodule/wls directory to the MW_HOME/wlserver_10.3/server/lib/mbeantypes directory.
[fusion@fmwhost ~]$ ls -ltr /app/fusion/fmw/wlserver_10.3/server/lib/mbeantypes/
total 2896
-rwxr-x— 1 fusion dba 225160 Mar 3 17:23 xacmlSecurityProviders.jar
-rwxr-x— 1 fusion dba 89950 Mar 3 17:23 wlManagementMBean.jar
-rwxr-x— 1 fusion dba 231618 Mar 3 17:23 wlManagementImplSource.jar
-rwxr-x— 1 fusion dba 54884 Mar 3 17:23 systemPasswordValidatorProvider.jar
-rwxr-x— 1 fusion dba 163566 Mar 3 17:23 saml2IdentityAsserter.jar
-rwxr-x— 1 fusion dba 181014 Mar 3 17:23 saml2CredentialMapper.jar
-rwxr-x— 1 fusion dba 1662107 Mar 3 17:23 cssWlSecurityProviders.jar
-rwxr-x— 1 fusion dba 8139 Mar 3 17:23 commo.dtd
-rwxr-x— 1 fusion dba 306020 Mar 3 17:23 WLSSSecurityProviders.jar
[fusion@fmwhost ~]$ ls -ltr /app/fusion/fmw/iam/server/loginmodule/wls/
total 1604
-rwxrwxrwx 1 fusion dba 430383 Oct 10 07:04 oimsignaturembean.jar
-rwxrwxrwx 1 fusion dba 432248 Oct 10 07:04 oimsigmbean.jar
-rwxrwxrwx 1 fusion dba 421374 Oct 10 07:04 oimmbean.jar
-rwxrwxrwx 1 fusion dba 333397 Oct 10 07:04 OIMAuthenticator.jar
[fusion@fmwhost ~]$ cp -pr /app/fusion/fmw/iam/server/loginmodule/wls/* /app/fusion/fmw/wlserver_10.3/server/lib/mbeantypes/
2. Change directory to MW_HOME/wlserver_10.3/server/lib/mbeantypes/
[fusion@fmwhost ~]$ cd /app/fusion/fmw/wlserver_10.3/server/lib/mbeantypes/
3. Change the permissions on these files to 750 by using the chmod command.
[fusion@fmwhost mbeantypes]$ chmod 750 *
Creating the wlfullclient.jar File
Oracle Identity Manager uses the wlfullclient.jar library for certain operations. Oracle does not ship this library, so you must create this library manually. We will see mention of this during provisioning.
[fusion@fmwhost ~]$ cd /app/fusion/fmw/wlserver_10.3/server/lib
[fusion@fmwhost lib]$ ls -l wlfullclient.jar
wlfullclient.jar: No such file or directory
[fusion@fmwhost lib]$ java -jar wljarbuilder.jar
…
Created new jar file: /app/fusion/fmw/wlserver_10.3/server/lib/wlfullclient.jar
[fusion@fmwhost lib]$ ls -l wlfullclient.jar
-rw-r–r– 1 fusion dba 55004433 Mar 4 17:14 wlfullclient.jar
This concludes the installation of Oracle Identity Management components. Instead of directly configuring these components, we need to apply the mandatory patches first. These patches are listed in the latest release notes. Please refer to the latest release notes for the list of updated patches when you are installing.
Please note that the Webgate Patch is pending since we are yet to install webgate. We will install if required after installing webgate later
Next: Configure Oracle Identity and Access Management components
Installing Oracle Fusion Applications – steps
- Install Fusion Applications Provisioning Framework
- Install Oracle 11g Database (Applications Transactional Database)
- Run Oracle Fusion Applications Repository Creation Utility (Applications RCU)
- Create another database for Oracle Identity Management Infrastructure (optional)
- Run Repository Creation Utility (RCU) for Oracle Identity Management components
- Install Oracle Identity and Access Management Components
- Apply mandatory Patches
- Configure Oracle Identity and Access Management components
- Integrate Oracle Identity Manager (OIM) and Oracle Access Manager (OAM)
- Install provisioning framework on Node 2
- Create new Response File
- Provision an Applications Environment (Editing in progress, this link currently points to 11.1.5 counterpart)


Recent Comments