Fusion Applications 11.1.5 installation is not straightforward unlike E-Business Suite 11i/R12 installation. So we need to divide the installation into following main steps. Please note that we have changed the default order since we are going to host both RCU in one database which is fine since both have different schemas. This will save us a lot of Memory for the VM or Host. Please note that we will be performing single node installation so all components will be installed on single node. All steps are provided with detailed screenshots.
Note: If you are looking for Fusion Applications 11.1.7 installation steps then you can refer to following link.
http://www.oratraining.com/blog/2013/11/oracle-fusion-applications-installation-step-by-step-guide-11-1-7/
If you are looking for Fusion Applications 11.1.6 installation steps then you can refer to following link.
http://www.oratraining.com/blog/2013/03/oracle-fusion-applications-installation-step-by-step-guide-11-1-6/
Note: I could see that a lot of you were still referring to the installation steps in my older posts for FA 11.1.1.5 or 11.1.4 etc, I have redirected all those old posts to this now. Also please do not use a saved version of the posts since we keep updating the posts based on new findings, issues, workarounds and suggestion from fellow community members. If you still want the documents for older versions, please comment below so that I will provide alternate link to you.
Preparing for Oracle Fusion Applications installation
-
Downloading Oracle Fusion Applications media
-
OR
Install Oracle Linux or Solaris on a Physical machine (We are using physical machine this time)
-
Staging/Creating Oracle Fusion Applications provisioning repository
Installing Oracle Fusion Applications – steps
-
-
-
-
Create another database for Oracle Identity Management Infrastructure (optional)
-
-
-
-
-
-
-
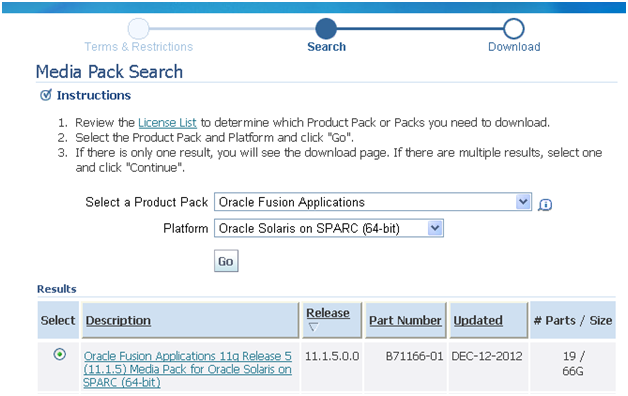
We are going to install Fusion Applications 11.1.5 for Oracle Solaris Operating system. The installation is almost same as Linux installation so you can use this guide for any installation. So we will download the installation media for Oracle Fusion Applications 11.1.5 for Oracle Solaris SPARC from http://edelivery.oracle.com
Login to access the following screen.

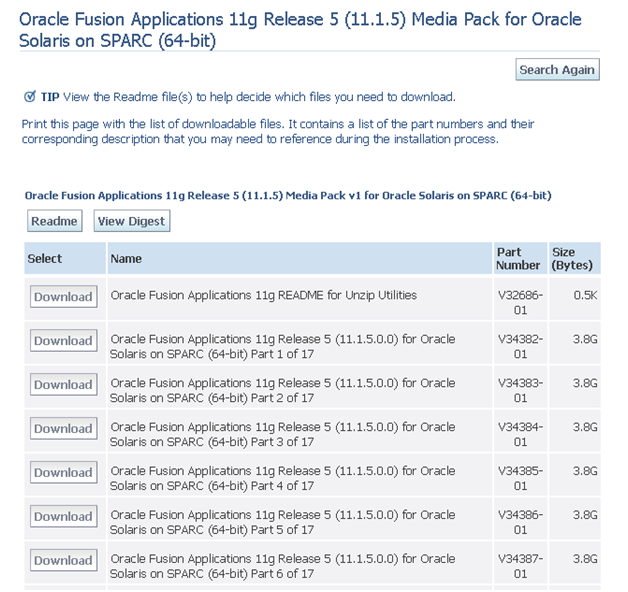
Select “Oracle Fusion Applications” and required platform from the list. Click Go. Open the first pack.

Download the first 17 media files (excluding README). We will not need rest of the media for this installation. Unzip all these files into one Stage directory.
Important Note: Since some of the files have very long directory path (very close to 255 characters), please unzip these files into stage folder name to keep short name. At least 2 files have very long path so let us try to avoid this.
We must have OS installed either on physical or a virtual machine in order to proceed with the installation.
Note: We can also use VMWare to host the Virtual Machine. We will post another guide on setting up VMWare virtual machine. But the good thing is that the virtual machine/disks which we create in VirtualBox, same we can use in VMWare as well since we will create .vmdk format disks. This will add flexibility for you to use it anywhere later.
We are using following configuration for our single node installation.
Server: Oracle (Sun) Enterprise Server
OS: Oracle Solaris 10 64 bit
Memory: Recommended 64 GB. More the memory, smoother the installation
Swap disk: 80 GB
Local available Disk space: 300 GB
Processor: Sun SPARC Quod core processor
Next: Install Fusion Applications Provisioning Framework


Recent Comments