Oracle Fusion Applications Installation: Configuring Oracle Identity and Access Management components
Previous: Installing Oracle Identity and Access Management Components
Configuring Oracle Identity Management components” can be divided into following tasks. Please note that we will not configure Oracle Virtual Directory, Oracle Identity Federation etc.
- Configuring the Web Tier
- Create Weblogic Domain for Identity Management
- Extending the Domain with Oracle Internet Directory
- Extending the Domain with Oracle Directory Service Manager (ODSM)
- Extending the Domain with Oracle Access Manager
- Preparing Identity and Policy Stores
-
Extending the Domain to Configure Oracle Identity Manager and Oracle SOA Suite
Please note that this post is going to be long so allow time to load all images.
Configuring the Web Tier
Start the configuration from <Web_Home>/bin
[oracle@fusion web]$ cd /app/fusion/fmw/web/bin/
[oracle@fusion bin]$ ./config.sh &
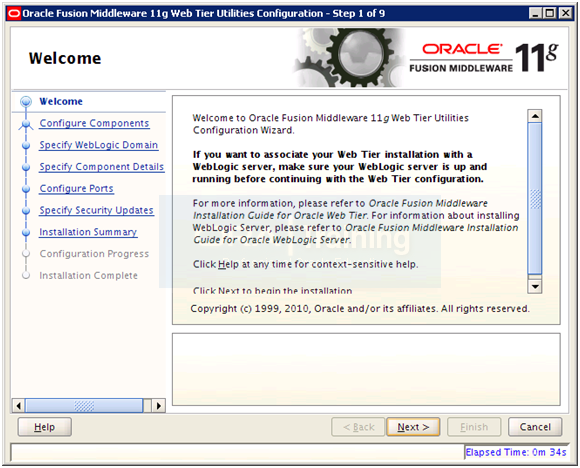
Click Next
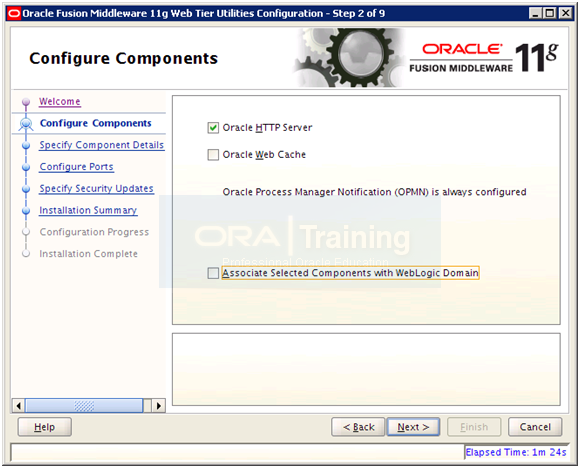
Select “Oracle HTTP Server” and click Next
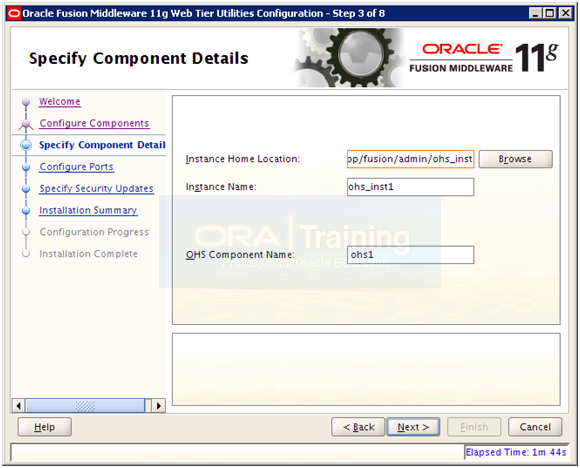
For Instance location enter “/app/fusion/admin/ohs_inst1” since we will keep all instances in this location. Provide any appropriate Instance name and OHS component name. We will go for the defaults. Click Next

Select “Specify Ports using Configuration File” and enter file name as /home/oracle/staticports.ini
Now we will copy staticports.ini default file from <repository_location>/installers/webtier/Disk1/stage/Response to home directory /home/oracle
cp /mnt/fusion/installers/webtier/Disk1/stage/Response/staticports.ini ~/staticports.ini
Now click on “View/Edit File” to edit this file.
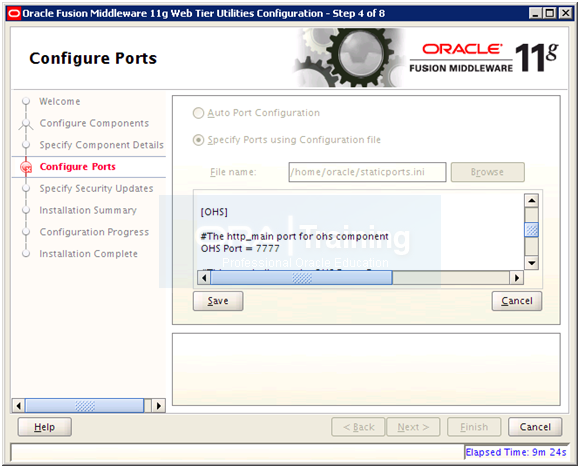
Uncomment and set the following values. Click Save
OPMN Local Port = 6700
OHS Port = 7777
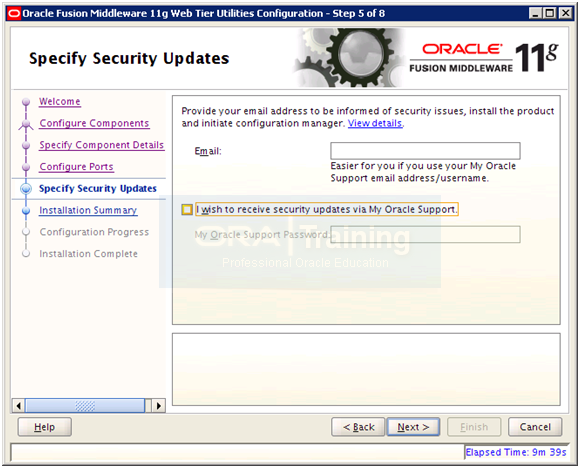
Deselect email notification and click Next
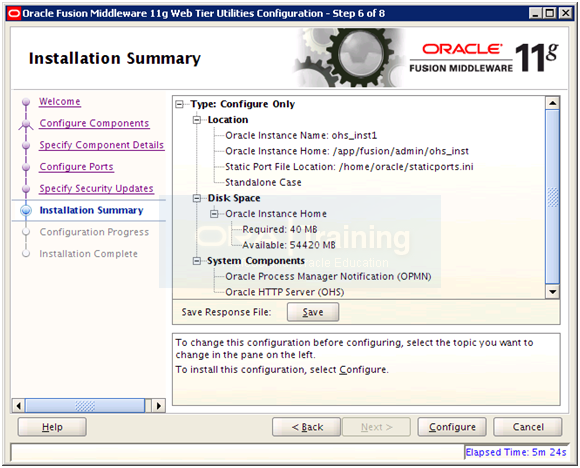
Save summary if needed and click Configure to start configuration.
Important Note: If SELinux is enabled in your Linux operating System then it will throw an error. Since we already disabled it during installation, we will not see that error here.
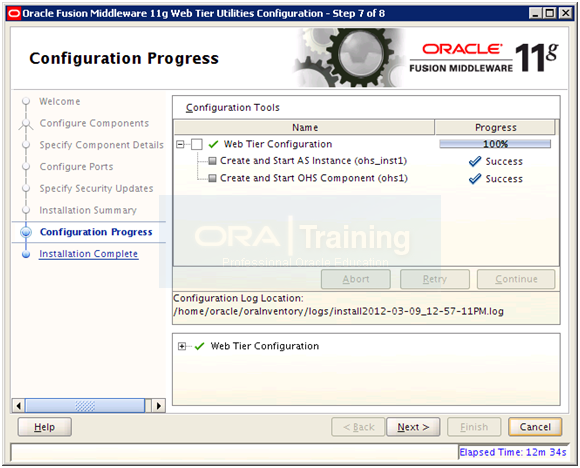
Once installation finishes, click Next
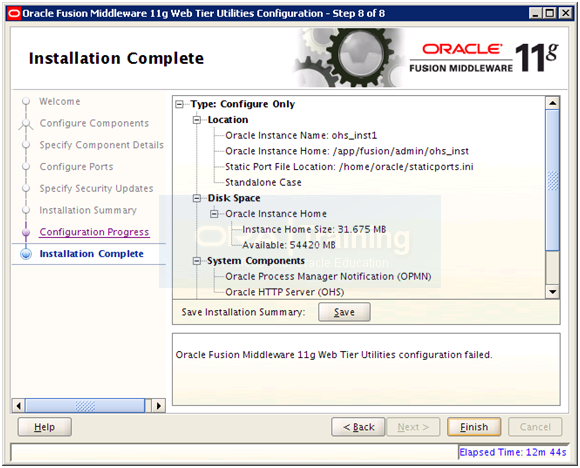
Save installation summary if needed and click Finish to complete the installation.
It would have already started HTTP server now. We can verify the same.
[oracle@fusion instances]$ ps -ef | grep http
oracle 3521 3491 0 10:06 ? 00:00:00 /app/fusion/fmw/web/ohs/bin/httpd.worker -DSSL
oracle 3547 3521 0 10:06 ? 00:00:00 /app/fusion/fmw/web/ohs/bin/httpd.worker -DSSL
oracle 3548 3521 0 10:06 ? 00:00:00 /app/fusion/fmw/web/ohs/bin/httpd.worker -DSSL
oracle 3549 3521 0 10:06 ? 00:00:00 /app/fusion/fmw/web/ohs/bin/httpd.worker –DSSL
Check /app/fusion/admin/ohs_inst1/config/OHS/ohs1/httpd.conf to make sure it reflects correct user and group name
User oracle
Group oinstall
We can launch http://fusion:7777 (Homepage of Oracle HTTP server) now. It will look as follows.
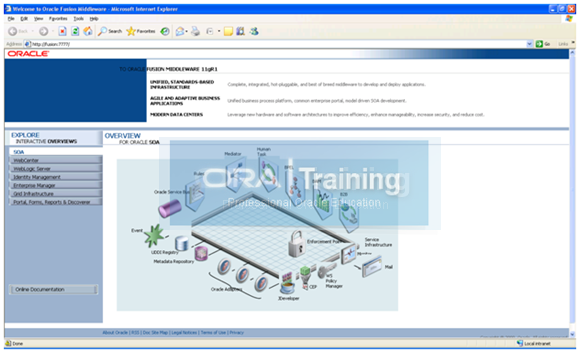
Create Weblogic Domain for Identity Management
Start the configuration from <Middleware Home>/oracle_common/commin/bin
[oracle@fusion bin]$ cd /app/fusion/fmw/oracle_common/common/bin/
[oracle@fusion bin]$ ./config.sh &
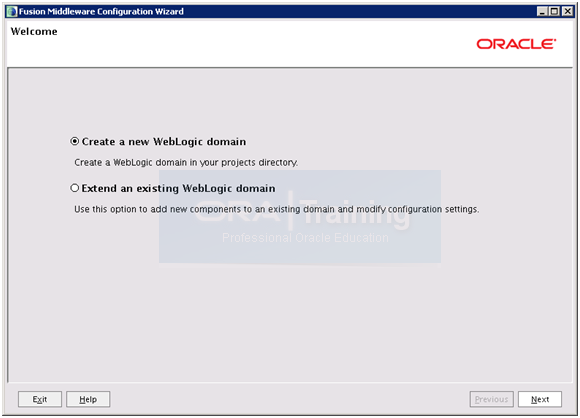
Select “Create a new Weblogic domain” and click Next
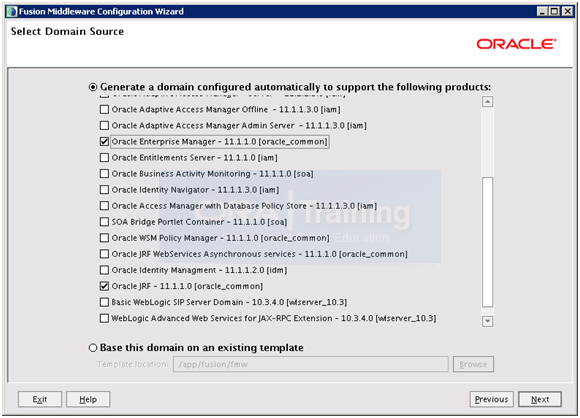
Select “Oracle Enterprise Manager – 11.1.1.0 [oracle_common]” and “Oracle JRF – 11.1.1.0 [oracle_common]” and click Next
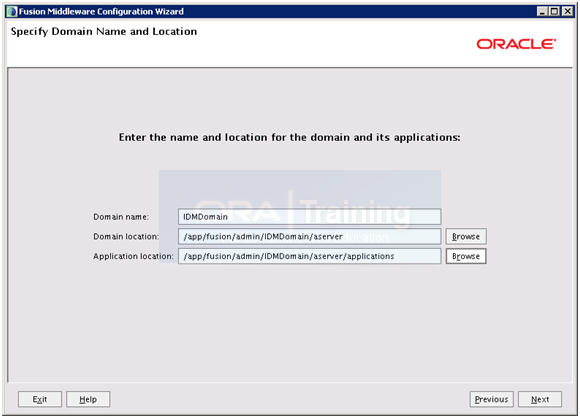
Enter details as above and click Next.
Domain Name: IDMDomain
Domain Location: /app/fusion/admin/IDMDomain/aserver
Application location: /app/fusion/admin/IDMDomain/aserver/applications
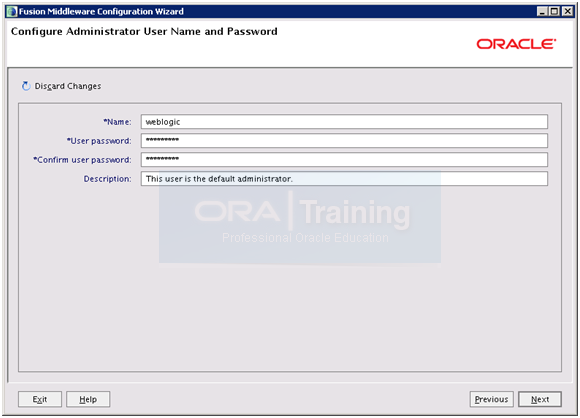
Since it accepts minimum 8 characters set password again to Oracle123. Please note that you can also change username from weblogic but we will go for default “weblogic” username. As informed earlier we will use Oracle123 as password for all steps.
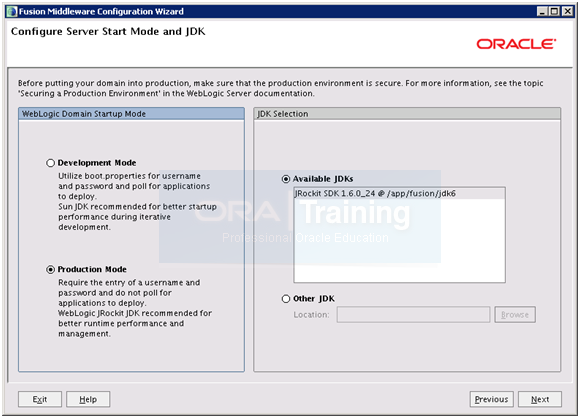
You would see option of Oracle JRockit here. So select that JDK in this list.
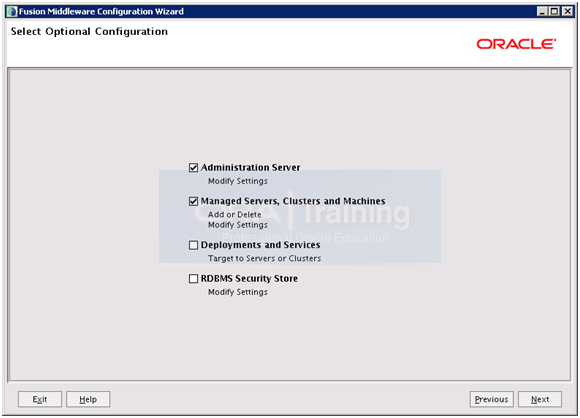
Select “Administration Server” and “Managed Servers, Clusters and Machines”. Click Next
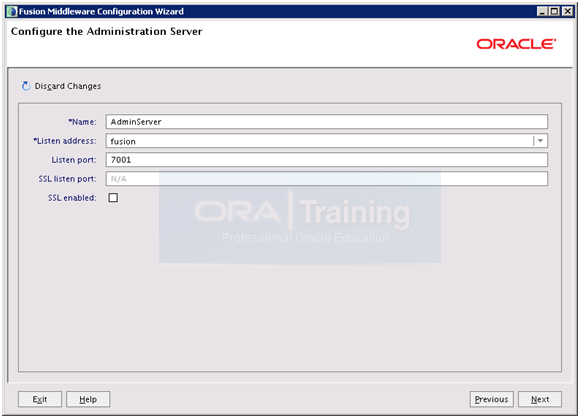
Keep defaults but make a note of the port since this will be widely used during next part of installation. Click Next
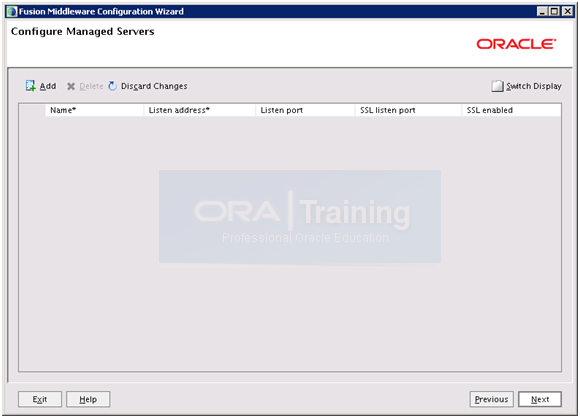
Just click Next
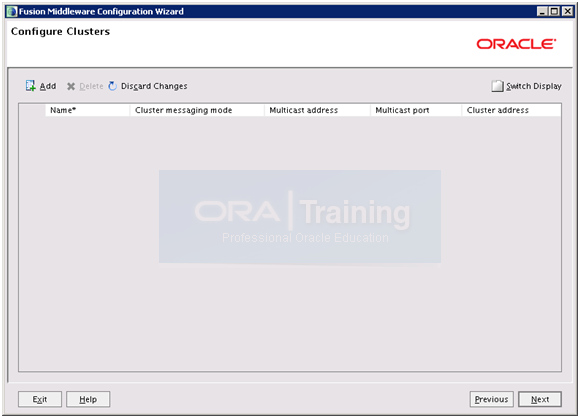
Click Next again
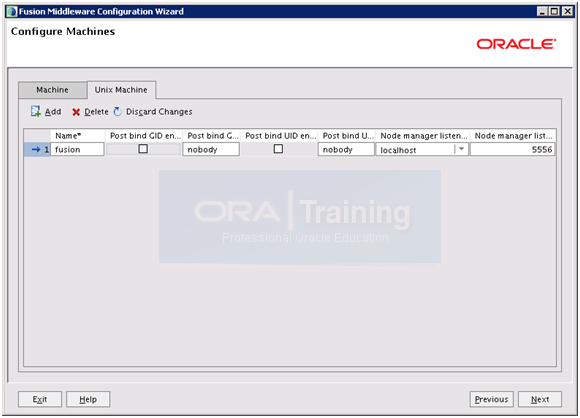
Select Second Tab “Unix Machine” and enter the hostname as above. Click Next
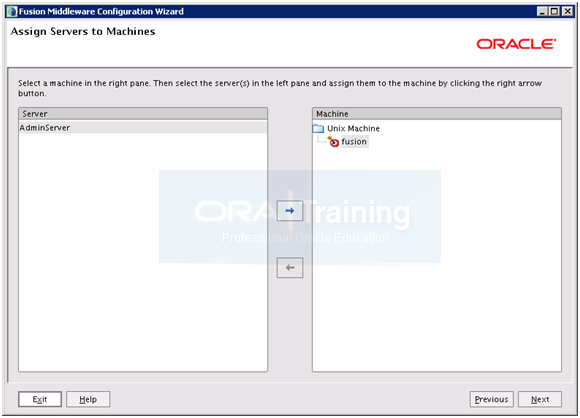
Click on AdminServer and Click right arrow. Click Next
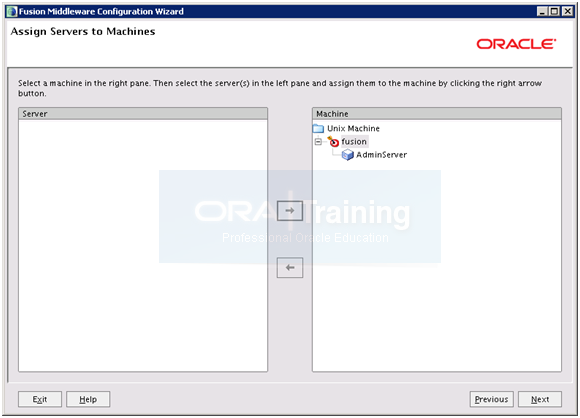
It will now look as above. Click Next
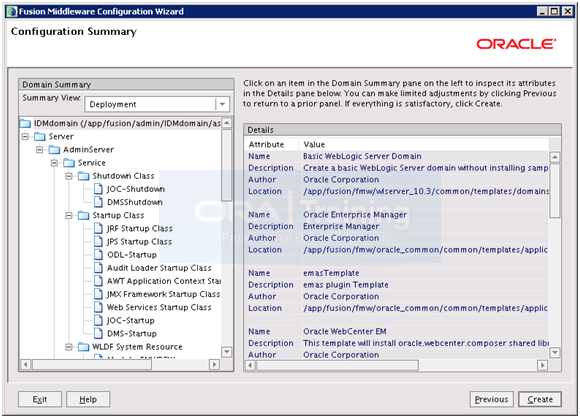
On Summary page click Create
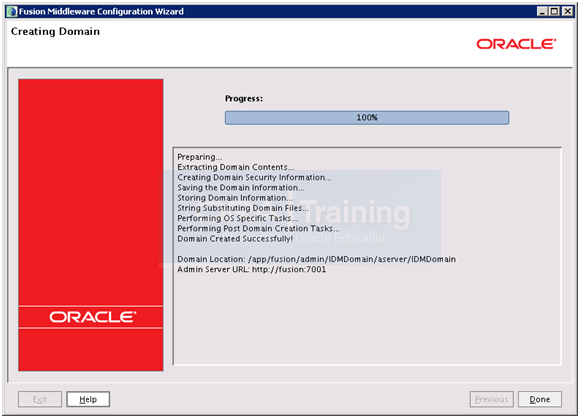
Once installation finishes, click Done
Make sure that the encrypted username and password values are already in boot.properties
[oracle@fusion security]$ more /app/fusion/admin/IDMDomain/aserver/IDMDomain/servers/\
AdminServer/security/boot.properties
# Generated by Configuration Wizard on Mon Jan 23 10:59:07 GST 2012
username={AES}zaXc3+4y2KGuxnK6WkI7ehKcliQDeandkjdTdu0vpuY=
password={AES}WZ6Zo+j6aGoCyE2nQmCCdboEkA8TDGRlagdSqFGRedo=
If you don’t have the boot.properties file or security folder present then create one as follows.
[oracle@fusion fusion]$ mkdir -p /app/fusion/admin/IDMDomain/aserver/IDMDomain/servers/AdminServer/security
[oracle@fusion security]$ cd \
/app/fusion/admin/IDMDomain/aserver/IDMDomain/servers/AdminServer/security
[oracle@fusion security]$ vi boot.properties
<Enter following values and save the file>
username=weblogic
password=Oracle123
Next time when you restart Admin server it will encrypt the username and password automatically.
Start Node manager
[oracle@fusion security]$ cd /app/fusion/fmw/wlserver_10.3/server/bin/
[oracle@fusion bin]$ ./startNodeManager.sh &
Set StartScriptEnabled=true in nodemanager.properties by running following script
[oracle@fusion bin]$ cd /app/fusion/fmw/oracle_common/common/bin
[oracle@fusion bin]$ ./setNMProps.sh
Appending required nodemanager.properties
Verify the change.
[oracle@fusion bin]$ tail -f /app/fusion/fmw/wlserver_10.3/common/nodemanager/nodemanager.properties
#Required NM Property overrides (append to existing nodemanager.properties)
StartScriptEnabled=true
Kill node manager script. Start Node Manager again as follows.
[oracle@fusion bin]$ nohup ./startNodeManager.sh &
The log file should show following entries to confirm that Node manager came up successfully.
…
INFO: Secure socket listener started on port 5556
Start Weblogic AdminServer
[oracle@fusion bin]$ nohup
/app/fusion/admin/IDMDomain/aserver/IDMDomain/bin/startWebLogic.sh &
tail nohup.out file until it shows following message.
<Jan 23, 2012 11:55:21 AM GST> <Notice> <WebLogicServer> <BEA-000360> <Server started in RUNNING mode>
Note: If you ever get error like
<Info> <Management> <BEA-141281> <unable to get file lock, will retry …>
Then do the following
Kill any running processes for startWeblogic.sh and then remove the lock files as follows.
-bash-3.2$ rm /app/fusion/admin/IDMDomain/aserver/IDMDomain/servers/AdminServer/tmp/AdminServer.lok
This error appears if you the admin server or managed server did not stop properly earlier.
Open Weblogic Admin Console
Launch Weblogic Admin console through
http://fusion:7001/console
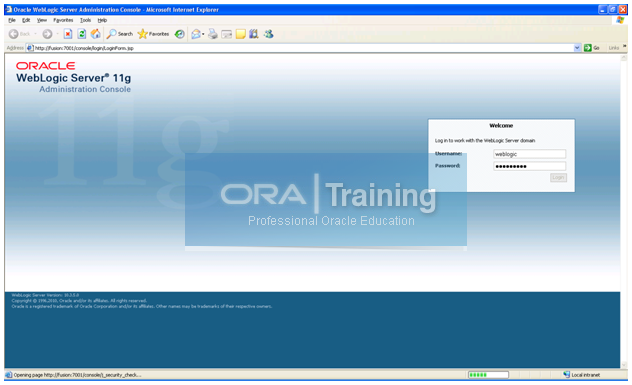
Login with weblogic/Oracle123
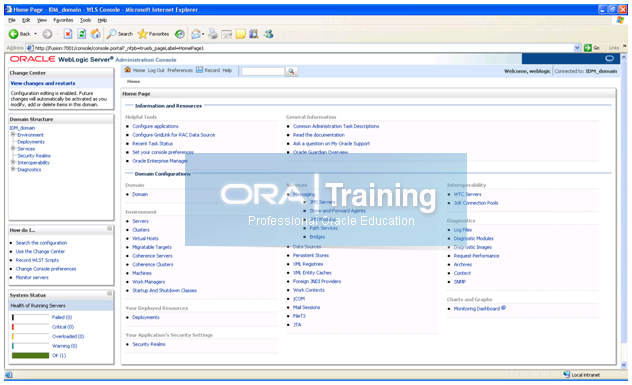
Note: Go to preferences and change “automatic acquire lock” settings to avoid accidental changes.

Configuring HTTP server for the Administration Server
Create a new file admin.conf as follows.
[oracle@fusion moduleconf]$ more /app/fusion/admin/ohs_inst1/config/OHS/ohs1/moduleconf/admin.conf
# Admin Server and EM
<Location /console>
SetHandler weblogic-handler
WebLogicHost fusion
WeblogicPort 7001
</Location>
<Location /consolehelp>
SetHandler weblogic-handler
WebLogicHost fusion
WeblogicPort 7001
</Location>
<Location /em>
SetHandler weblogic-handler
WebLogicHost fusion
WeblogicPort 7001
</Location>
Restart http server as follows.
ORACLE_HOME=/app/fusion/fmw/web
export ORACLE_HOME
ORACLE_INSTANCE=/app/fusion/admin/ohs_inst1
export ORACLE_INSTANCE
PATH=$ORACLE_HOME/opmn/bin:$PATH
export PATH
opmnctl stopall
opmnctl startall
Register HTTP server with Weblogic Server
Now we need to Register HTTP server with Weblogic Server so that Enterprise Manager can monitor the instance.
[oracle@fusion ~]$ opmnctl registerinstance -adminHost fusion -adminport 7001 -adminUsername weblogic
Command requires login to weblogic admin server (fusion):
Username: weblogic
Password:
…
Done
Registering instance
Command succeeded.
Note: We will not enable load-balancer access since we have skipped load-balancing in this single node installation guide.
Now you can launch Admin Server via Web server port 7777
http://fusion:7777/console
http://fusion:7777/em
Enable Weblogic Plugin
Log in the Oracle Weblogic Server Administration and click on Lock and Edit. Click on IDMDomain and Click on Configuration tab and then select the Web Applications tab.
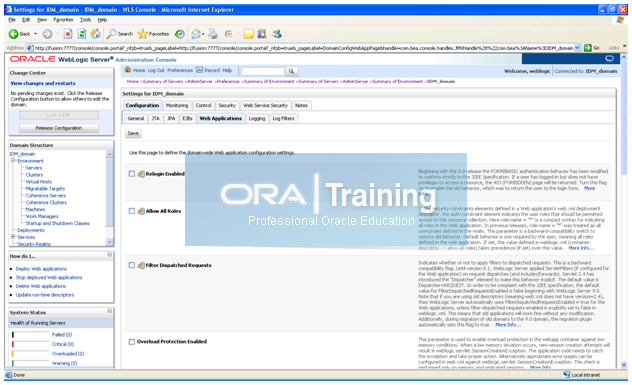
Scroll down and enable “Weblogic Plug-in Enabled”.
Click on Save and Activate the Changes.

Restart the Weblogic Administration Server.
Check Enterprise Manager by launching http://fusion:7777/em
Login with weblogic/<password>

Since we are using web server port for launching all pages, we need to change the frontend host and port to the one used by web server.
Login to Weblogic Admin console.
In the preferences link on the top, shared preferences->deselect Follow Configuration Changes.

Click Lock and Edit. Select Servers->AdminServer. In the protocols tab click on HTTP and change the following values. Now click on Activate changes.

Extending the Domain with Oracle Internet Directory
Start the configuration from <IDM Oracle Home/bin
[oracle@fusion bin]$ cd /app/fusion/fmw/idm/bin
[oracle@fusion bin]$ ./config.sh &
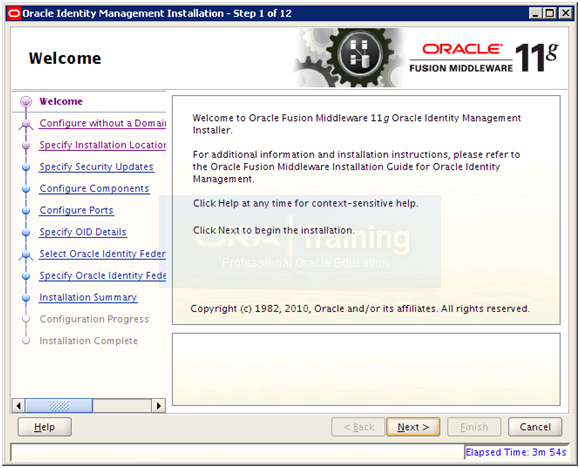
Click Next
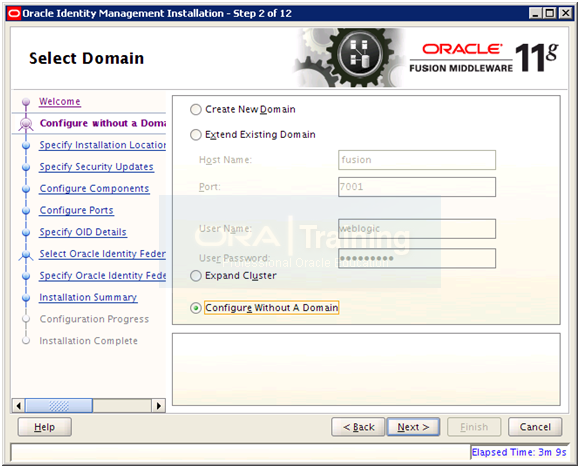
Select “Configure Without A Domain” and click Next
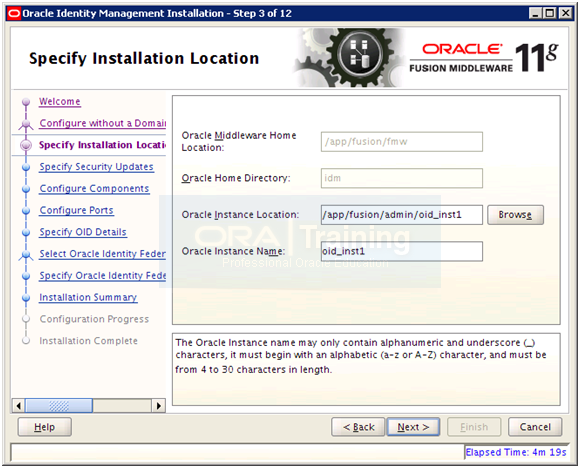
Enter values as follows. Click Next
Instance Location: /app/fusion/admin/oid_inst1
Instance Name: oid_inst1
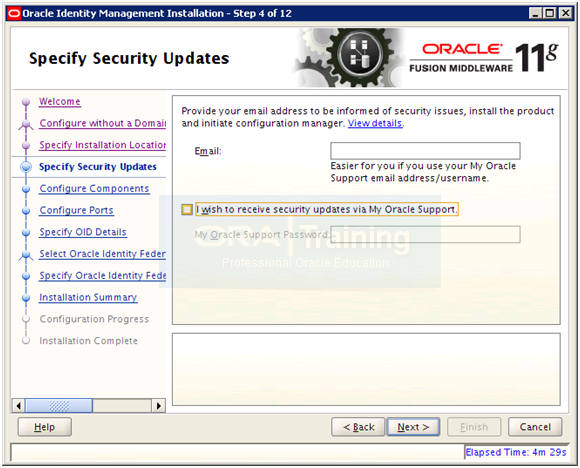
Deselect email notification and click Next
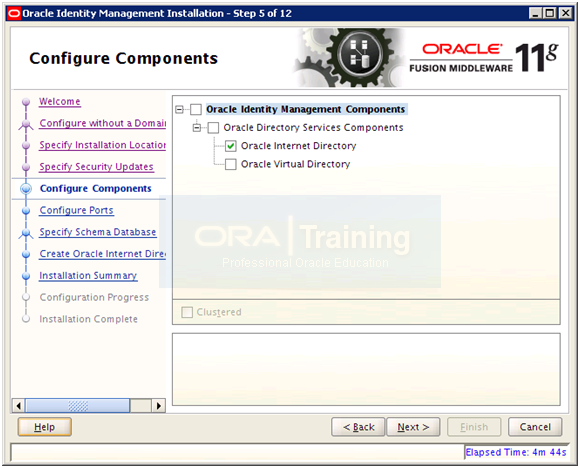
Select only “Oracle Internet Directory” and click Next
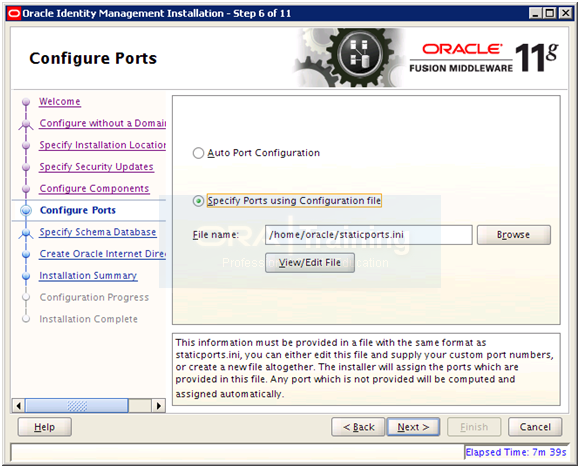
Select “Specify Ports using Configuration File” and enter file name as /home/oracle/staticports.ini
In another terminal window copy the staticports.ini file to home directory.
[oracle@fusion bin]$ cp /app/fusion/provisioning/idm/idm/Disk1/stage/Response/staticports.ini ~/
Click on View/Edit file
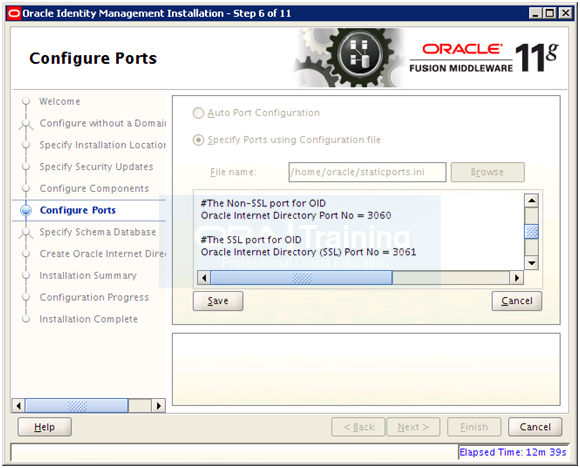
Change the values as follows and click Save.
VERY IMPORTANT:
As per Oracle Manual ideally we should have changed it to as follows.
#The Non-SSL port for OID
Oracle Internet Directory Port No = 389
#The SSL port for OID
Oracle Internet Directory (SSL) Port No = 636
But OID fails to configure and start at the end of installation with these values so we will stick to the OID values for 11g in the staticports.ini and just remove the comments.
#The Non-SSL port for OID
Oracle Internet Directory Port No = 3060
#The SSL port for OID
Oracle Internet Directory (SSL) Port No = 3061
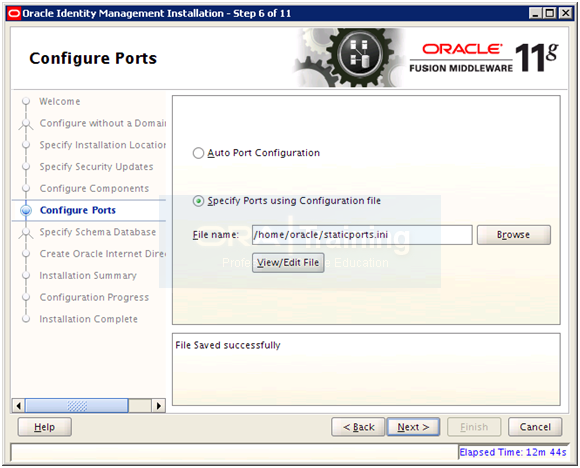
Once saved, click Next
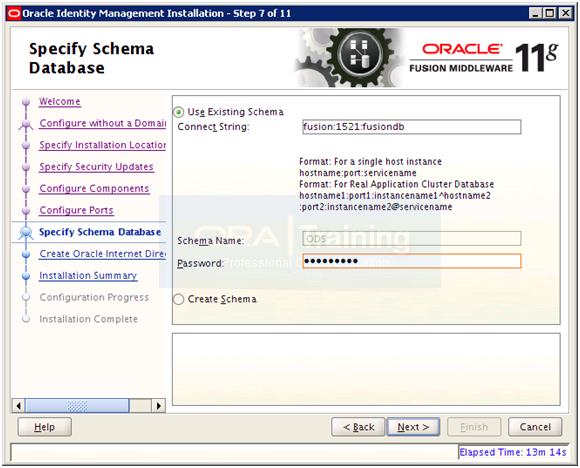
Enter Oracle123 or any suitable password. If you are using different passwords then please make a note of all of them. Click Next
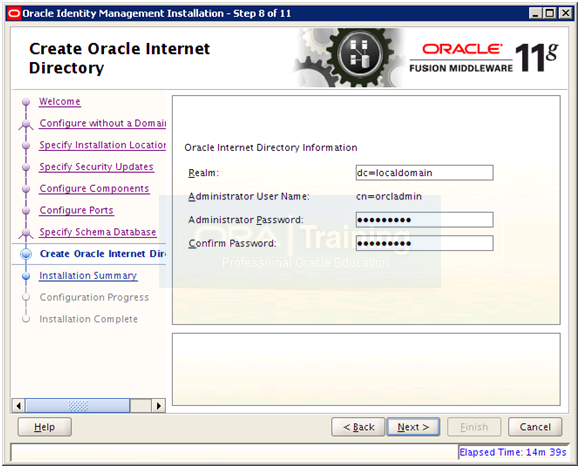
Since we are not using any domains as such but as we have added an entry in our hosts file for fusion.localdomain, we will add “dc=localdomain” for Realm. Enter Oracle123 or any suitable password. Click Next
[oracle@fusion ~]$ more /etc/hosts
127.0.0.1 localhost.localdomain localhost
192.168.56.101 fusion fusion.localdomain
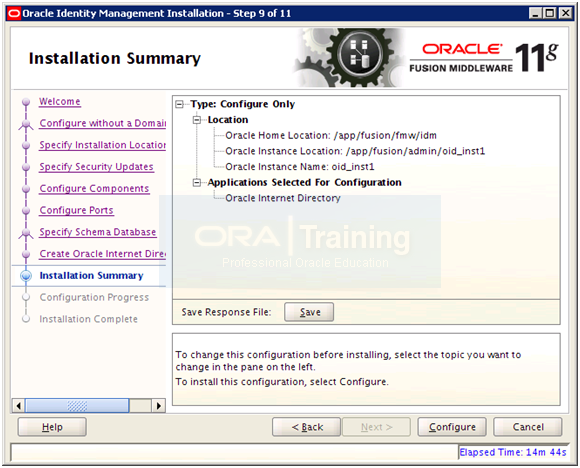
Save summary if needed and click Configure to start configuration.
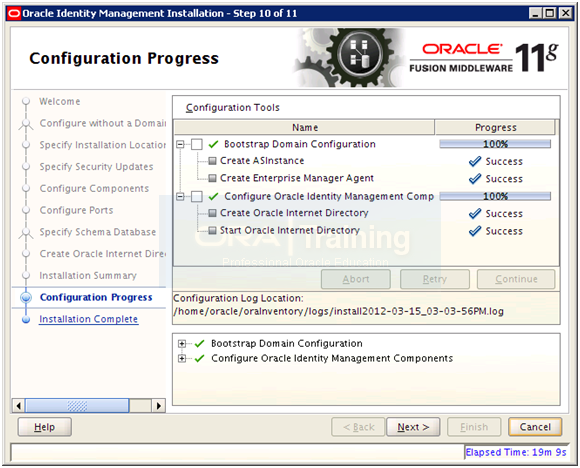
Once installation finishes, click Next
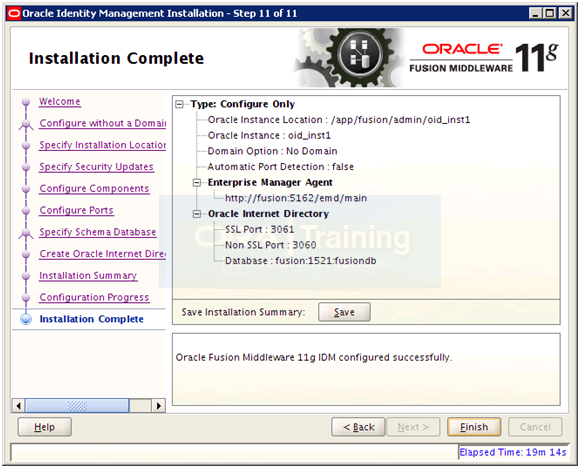
Save installation summary if needed and click Finish to complete the installation.
Validate the OID installation
[oracle@fusion ~]$ export ORACLE_HOME=/app/fusion/fmw/idm
[oracle@fusion ~]$ export ORACLE_INSTANCE=/app/fusion/admin/oid_inst1
[oracle@fusion ~]$ export PATH= \
$ORACLE_HOME/opmn/bin:$ORACLE_HOME/bin:$ORACLE_HOME/ldap/bin: \
$ORACLE_HOME/ldap/admin:$PATH
[oracle@fusion ~]$ ldapbind -h fusion -p 3060 -D “cn=orcladmin” -q
Please enter bind password:
bind successful
[oracle@fusion ~]$ ldapbind -h fusion -p 3061 -D “cn=orcladmin” -q -U 1
Please enter bind password:
bind successful
[oracle@fusion ~]$ opmnctl status
Processes in Instance: oid_inst1
———————————+——————–+———+———
ias-component | process-type | pid | status
———————————+——————–+———+———
oid1 | oidldapd | 19810 | Alive
oid1 | oidldapd | 19798 | Alive
oid1 | oidmon | 19785 | Alive
EMAGENT | EMAGENT | 19325 | Alive
Registering Oracle Internet Directory with the WebLogic Server Domain
[oracle@fusion provisioning]$ export ORACLE_HOME=/app/fusion/fmw/idm
[oracle@fusion provisioning]$ export ORACLE_INSTANCE=/app/fusion/admin/oid_inst1
[oracle@fusion provisioning]$ $ORACLE_INSTANCE/bin/opmnctl \
registerinstance -adminHost fusion -adminPort 7001 -adminUsername weblogic
Command requires login to weblogic admin server (fusion):
Username: weblogic
Password:
Registering instance
Command succeeded.
Note: We have skipped next steps related to SSL since we are setting up non-SSL connections here.
Update the Enterprise Manager Repository URL
Next we will update the Enterprise Manager Repository URL using the emctl utility with the switchOMSflag. The emctl utility is located under the ORACLE_INSTANCE/EMAGENT/EMAGENT/bin directory.
[oracle@fusion ~]$ cd $ORACLE_INSTANCE/EMAGENT/EMAGENT/bin
[oracle@fusion bin]$ ./emctl switchOMS http://fusion:7001/em/upload
Oracle Enterprise Manager 10g Release 5 Grid Control 10.2.0.5.0.
Copyright (c) 1996, 2009 Oracle Corporation. All rights reserved.
SwitchOMS succeeded.
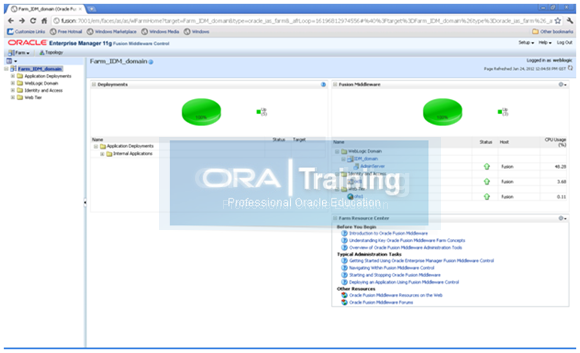
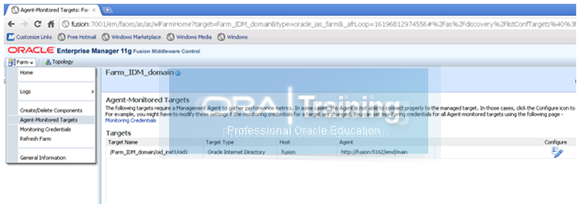
We can now verify whether this instance is registered for monitoring agent.
Login to http://fusion:7001/em
Click on Farm->Agent monitored targets.
Extending the Domain with Oracle Directory Service Manager (ODSM)
Start the configuration from <IDM Oracle Home>/bin
[oracle@fusion bin]$ cd /app/fusion/fmw/idm/bin/
[oracle@fusion bin]$ ./config.sh &
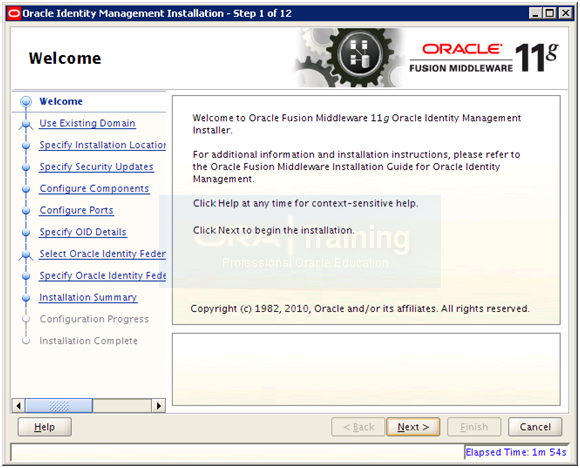
Click Next
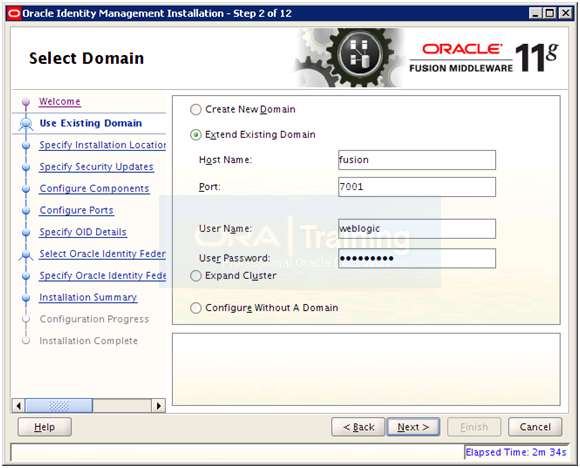
Select “Extend Existing Domain” and enter details of existing weblogic Server and AdminServer port. Click Next
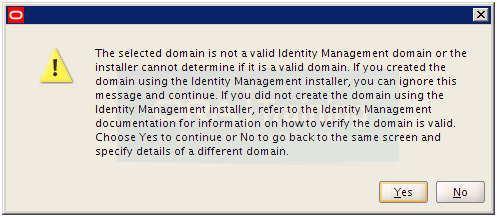
You can ignore this error since we created this domain using the Identity Management installer. Click Yes to ignore.
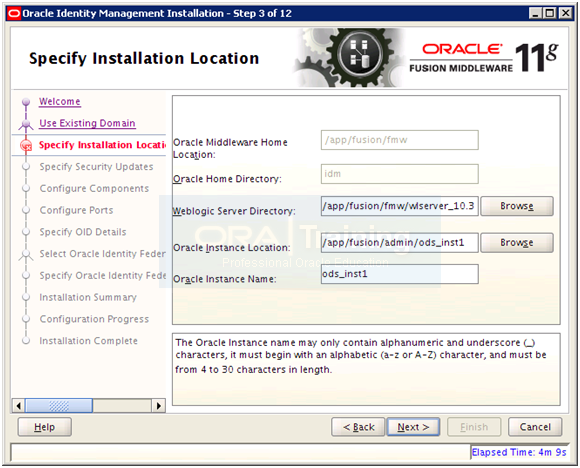
Verify that the weblogic server directory shown is correct as per previous steps. Specify name and path for Oracle Directory Service instance. Make sure to keep the instance in same parent directory as previous instances. Click Next
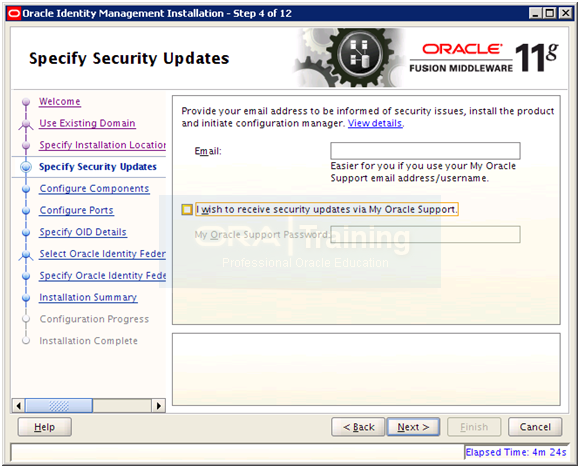
Deselect email notification and click Next
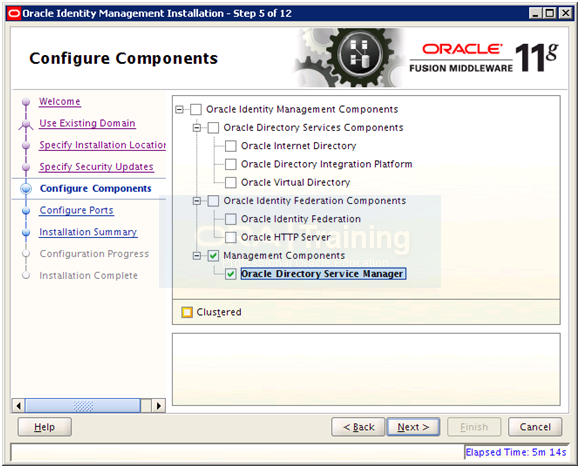
Select Oracle “Directory Service Manager” and click Next
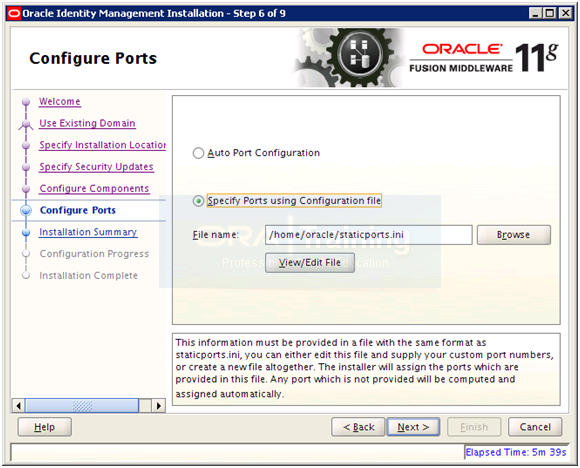
Select “Specify Ports using Configuration File” and enter file name as /home/oracle/staticports.ini
Meanwhile in another terminal window copy the staticports.ini to home directory.
[oracle@fusion bin]$ cp -p /app/fusion/provisioning/idm/idm/Disk1/stage/Response/staticports.ini ~/
Click View/Edit

Uncomment the ODS Server Port and keep it default 7006. Click Save

Once Saved click Next
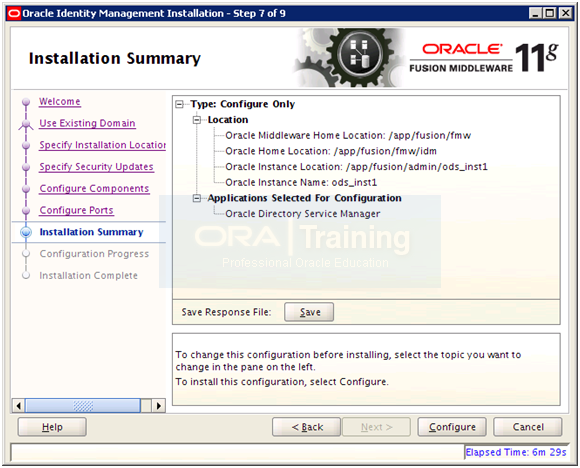
Save summary if needed and click Configure to start configuration.
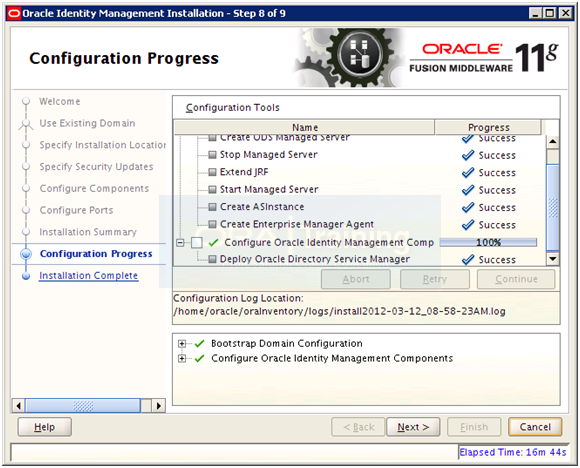
Once installation finishes, click Next
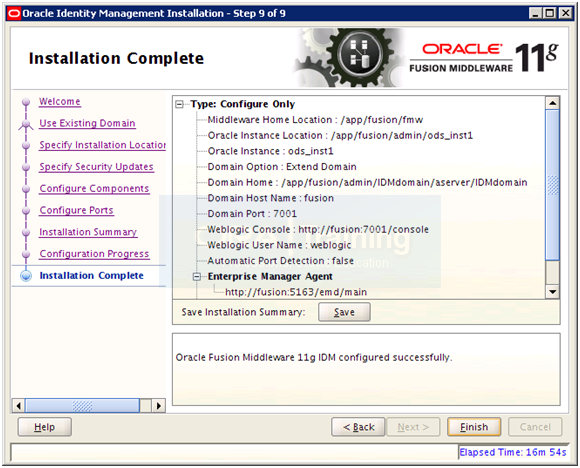
Save installation summary if needed and click Finish to complete the installation.
Password-less startup for ODS
cd /app/fusion/admin/IDMDomain/aserver/IDMDomain/servers/wls_ods1/security/ (if not present create this structure)
cp ../../AdminServer/security/boot.properties .
cd /app/fusion/admin/IDMDomain/aserver/IDMDomain/bin/
nohup ./startManagedWebLogic.sh wls_ods1 &
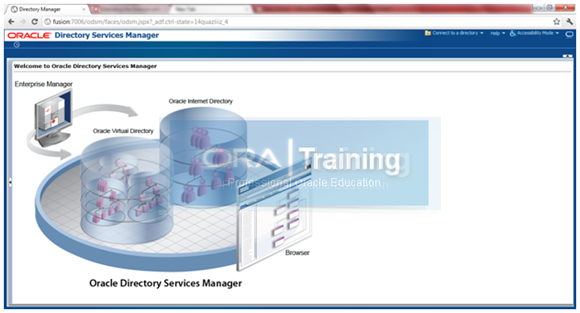
Now you can access ODS homepage at http://fusion:7006/odsm
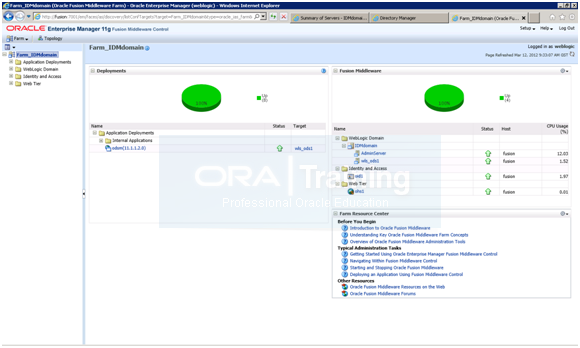
It will now also show up in http://fusion:7777/em
Configure Oracle Directory Service with OID
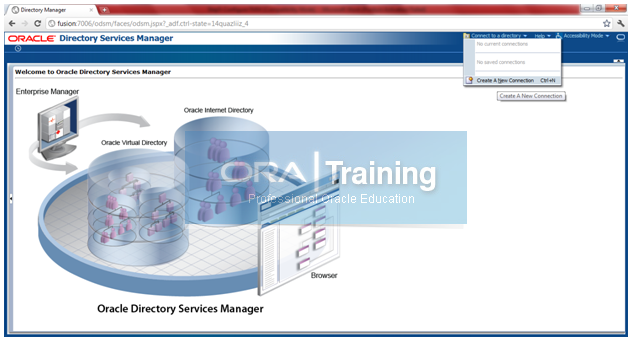
Click on Connect to a directory -> Create A New Connection
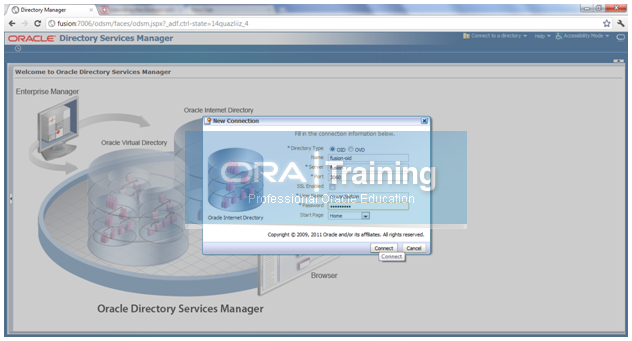
Enter the details for OID.
Name: fusion-oid
Server: fusion
SSL Enabled: Unchecked
User Name: cn=orcladmin
Password: Oracel123
Start Page: Home
Click Connect
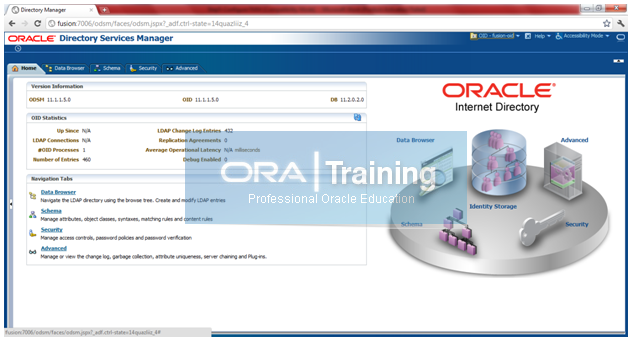
Once connection is successful, you should be able to see OID page
.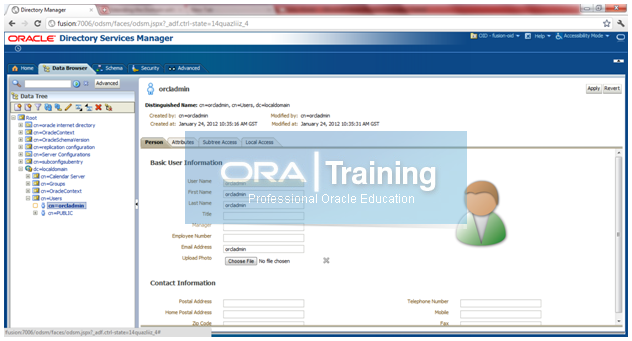
You can randomly check whether you are able to see details of any user, for example cn=orcladmin
Configuring Oracle HTTP Servers to Access the ODSM Console
[oracle@fusion moduleconf]$ cd /app/fusion/admin/ohs_inst1/config/OHS/ohs1/moduleconf/
[oracle@fusion moduleconf]$ vi admin.conf
# Append following lines in admin.conf
<Location /odsm>
SetHandler weblogic-handler
WebLogicHost fusion
WeblogicPort 7006
</Location>
Restart HTTP server.
Now we can access ODSM through http://fusion:7777/odsm/
http://fusion:7777/odsm
Apply following patches
- 12995033 for IDM Tools IAM_ORACLE_HOME
- 12989739 for OAM 11g IAM_ORACLE_HOME
- 12961473, 14109501 (could not locate this second patch) for OIM IAM_ORACLE_HOME [Skip post steps for 12961473 for now since there is another patch to be applied later which has same post steps and is subset patch for this]
- 12937765 for OID IDM_ORACLE_HOME
There is a patch listed for Webgate but you can apply it once we install Webgate. We have skipped this for now.
12816881 for OAM 10g WebGate
Preparing Identity and Policy Stores
A) Preparing the OPSS Policy Store
Creating Policy Store Users and the Policy Container
[oracle@fusion ~]$ cd /app/fusion/fmw/iam/idmtools/bin/
[oracle@fusion bin]$ export ORACLE_HOME=/app/fusion/fmw/iam
[oracle@fusion bin]$ export JAVA_HOME=/app/fusion/jdk6
[oracle@fusion bin]$ export IDM_HOME=/app/fusion/fmw/idm
[oracle@fusion bin]$ export MW_HOME=/app/fusion/fmw
[oracle@fusion bin]$ more policystore.props
POLICYSTORE_HOST: fusion
POLICYSTORE_PORT: 3060
POLICYSTORE_BINDDN: cn=orcladmin
POLICYSTORE_READONLYUSER: PolicyROUser
POLICYSTORE_READWRITEUSER: PolicyRWUser
POLICYSTORE_SEARCHBASE: dc=localdomain
POLICYSTORE_CONTAINER: cn=jpsroot
[oracle@fusion bin]$ ./idmConfigTool.sh -configPolicyStore input_file=policystore.props
Enter Policy Store Bind DN password :
…
Enter User Password for PolicyROUser:
Confirm User Password for PolicyROUser:
…
Enter User Password for PolicyRWUser:
Confirm User Password for PolicyRWUser:
…
Reassociating the Policy and Credential Store
[oracle@fusion bin]$ cd /app/fusion/fmw/oracle_common/common/bin/
[oracle@fusion bin]$ ./wlst.sh
wls:/offline> connect(“weblogic”,”Oracle123″,”t3://fusion:7001″)
wls:/IDMDomain/serverConfig> reassociateSecurityStore(domain=”IDMDomain”, admin=”cn=orcladmin”,password=”Oracle123″, ldapurl=”ldap://fusion:3060″,servertype=”OID”, jpsroot=”cn=jpsroot”)
…
…
Jps Configuration has been changed. Please restart the application server.
wls:/IDMDomain/serverConfig> wls:/IDMDomain/serverConfig> exit()
Restart Weblogic Admin Server.
B) Preparing the Identity Store
Extending Directory Schema for Oracle Access Manager
[oracle@fusion bin]$ more extend.props
IDSTORE_HOST: fusion
IDSTORE_PORT: 3060
IDSTORE_BINDDN: cn=orcladmin
IDSTORE_USERNAMEATTRIBUTE: cn
IDSTORE_LOGINATTRIBUTE: uid
IDSTORE_USERSEARCHBASE: cn=Users,dc=localdomain
IDSTORE_GROUPSEARCHBASE: cn=Groups,dc=localdomain
IDSTORE_SEARCHBASE: dc=localdomain
IDSTORE_SYSTEMIDBASE: cn=systemids,dc=localdomain
[oracle@fusion bin]$ ./idmConfigTool.sh -preConfigIDStore input_file=extend.props
Enter ID Store Bind DN password :
Creating Users and Groups for Oracle Access Manager
[oracle@fusion bin]$ more oam.props
IDSTORE_HOST: fusion
IDSTORE_PORT: 3060
IDSTORE_BINDDN: cn=orcladmin
IDSTORE_USERNAMEATTRIBUTE: cn
IDSTORE_LOGINATTRIBUTE: uid
IDSTORE_USERSEARCHBASE: cn=Users,dc=localdomain
IDSTORE_GROUPSEARCHBASE: cn=Groups,dc=localdomain
IDSTORE_SEARCHBASE: dc=localdomain
POLICYSTORE_SHARES_IDSTORE: true
OAM11G_IDSTORE_ROLE_SECURITY_ADMIN:OAMAdministrators
IDSTORE_OAMSOFTWAREUSER:oamLDAP
IDSTORE_OAMADMINUSER:oamadmin
[oracle@fusion bin]$ ./idmConfigTool.sh -prepareIDStore mode=OAM input_file=oam.props
Enter ID Store Bind DN password :
…
Enter User Password for oamadmin:
Confirm User Password for oamadmin:
…
Enter User Password for oamLDAP:
Confirm User Password for oamLDAP:
Creating Users and Groups for Oracle Identity Manager
[oracle@fusion bin]$ more oim.props
IDSTORE_HOST: fusion
IDSTORE_PORT: 3060
IDSTORE_BINDDN: cn=orcladmin
IDSTORE_USERNAMEATTRIBUTE: cn
IDSTORE_LOGINATTRIBUTE: uid
IDSTORE_USERSEARCHBASE: cn=Users,dc=localdomain
IDSTORE_GROUPSEARCHBASE: cn=Groups,dc=localdomain
IDSTORE_SEARCHBASE: dc=localdomain
POLICYSTORE_SHARES_IDSTORE: true
IDSTORE_SYSTEMIDBASE: cn=systemids,dc=localdomain
IDSTORE_OIMADMINUSER: oimLDAP
IDSTORE_OIMADMINGROUP: OIMAdministrators
[oracle@fusion bin]$ ./idmConfigTool.sh -prepareIDStore mode=OIM input_file=oim.props
Enter ID Store Bind DN password :
…
Enter User Password for oimLDAP:
Confirm User Password for oimLDAP:
…
Enter User Password for xelsysadm:
Confirm User Password for xelsysadm:
Creating Users and Groups for Oracle WebLogic Server
Add a read-only user to cn=orclFAUserReadPrivilegeGroup as follows
[oracle@fusion bin]$ export ORACLE_HOME=/app/fusion/fmw/idm
[oracle@fusion bin]$ more rou_member.ldif
dn: cn=orclFAUserReadPrivilegeGroup,cn=Groups,dc=localdomain
changetype: modify
add: uniquemember
uniquemember: cn=IDROUser,cn=Users,dc=localdomain
[oracle@fusion bin]$ /app/fusion/fmw/idm/bin/ldapmodify -h fusion -p 3060 -D cn=orcladmin -q -f rou_member.ldif
Please enter bind password:
modifying entry cn=orclFAUserReadPrivilegeGroup,cn=Groups,dc=localdomain
[oracle@fusion bin]$ export ORACLE_HOME=/app/fusion/fmw/iam
[oracle@fusion bin]$ more wls.props
IDSTORE_HOST: fusion
IDSTORE_PORT: 3060
IDSTORE_BINDDN: cn=orcladmin
IDSTORE_USERNAMEATTRIBUTE: cn
IDSTORE_LOGINATTRIBUTE: uid
IDSTORE_USERSEARCHBASE: cn=Users, dc=localdomain
IDSTORE_GROUPSEARCHBASE: cn=Groups,dc=localdomain
IDSTORE_SEARCHBASE: dc=localdomain
POLICYSTORE_SHARES_IDSTORE: true
[oracle@fusion bin]$ ./idmConfigTool.sh -prepareIDStore mode=WLS input_file=wls.props
Enter ID Store Bind DN password :
…
Enter User Password for weblogic_idm:
Confirm User Password for weblogic_idm:
Creating Users and Groups for Fusion Applications
[oracle@fusion bin]$ more fusion.props
IDSTORE_HOST: fusion
IDSTORE_PORT: 3060
IDSTORE_BINDDN: cn=orcladmin
IDSTORE_USERNAMEATTRIBUTE: cn
IDSTORE_READONLYUSER: IDROUser
IDSTORE_READWRITEUSER: IDRWUser
IDSTORE_USERSEARCHBASE:cn=Users,dc=localdomain
IDSTORE_GROUPSEARCHBASE: cn=Groups,dc=localdomain
IDSTORE_SEARCHBASE: dc=localdomain
IDSTORE_SUPERUSER: weblogic_fa
POLICYSTORE_SHARES_IDSTORE: true
[oracle@fusion bin]$ ./idmConfigTool.sh -prepareIDStore mode=fusion input_file=fusion.props
Enter ID Store Bind DN password :
*** Creation of IDROUser ***
Mar 22, 2012 3:05:58 PM oracle.ldap.util.LDIFLoader loadOneLdifFile
INFO: -> LOADING: /app/fusion/fmw/iam/idmtools/templates/oid/oam_user_template.ldif
Enter User Password for IDROUser:
Confirm User Password for IDROUser:
*** Creation of IDRWUser ***
Mar 22, 2012 3:06:03 PM oracle.ldap.util.LDIFLoader loadOneLdifFile
INFO: -> LOADING: /app/fusion/fmw/iam/idmtools/templates/oid/oam_user_template.ldif
Enter User Password for IDRWUser:
Confirm User Password for IDRWUser:
*** Creation of weblogic_fa ***
Mar 22, 2012 3:06:10 PM oracle.ldap.util.LDIFLoader loadOneLdifFile
INFO: -> LOADING: /app/fusion/fmw/iam/idmtools/templates/oid/oam_user_template.ldif
Enter User Password for weblogic_fa:
Confirm User Password for weblogic_fa:
Mar 22, 2012 3:06:15 PM oracle.ldap.util.LDIFLoader loadOneLdifFile
INFO: -> LOADING: /app/fusion/fmw/iam/idmtools/templates/common/oam_user_read_acl_template.ldif
Mar 22, 2012 3:06:15 PM oracle.ldap.util.LDIFLoader loadOneLdifFile
INFO: -> LOADING: /app/fusion/fmw/iam/idmtools/templates/oid/fa_add_pwdpolicy.ldif
Mar 22, 2012 3:06:15 PM oracle.ldap.util.LDIFLoader loadOneLdifFile
INFO: -> LOADING: /app/fusion/fmw/iam/idmtools/templates/oid/fa_add_pwdpolicy.ldif
Mar 22, 2012 3:06:15 PM oracle.ldap.util.LDIFLoader loadOneLdifFile
INFO: -> LOADING: /app/fusion/fmw/iam/idmtools/templates/oid/fa_add_pwdpolicy.ldif
The tool has completed its operation. Details have been logged to automation.log
In addition to creating the users, the idmConfigTool command you ran earlier
creates the following groups and assigns users to them:
orclFAGroupReadPrivilegeGroup
orclFAGroupWritePrivilegeGroup
orclFAUserReadPrivilegeGroup
orclFAUserWritePrefsPrivilegeGroup
orclFAUserWritePrivilegeGroup
Important Note: Check automation.log file now. If you see any message like “Error adding user to groups” then you must also do following steps. This is due to a bug introduced by one of the pre-requisite patches. If you have not applied these patches then you may not face the error. Regardless, nothing to worry since we have a solution as below.
No need to execute these if there were no errors in automation.log file.
[oracle@fusion bin]$ more rog_member.ldif
dn: cn=orclFAGroupReadPrivilegeGroup,cn=Groups,dc=localdomain
changetype: modify
add: uniquemember
uniquemember: cn=IDROUser,cn=Users,dc=localdomain
[oracle@fusion bin]$ more rwu_member.ldif
dn: cn=orclFAUserWritePrivilegeGroup,cn=Groups,dc=localdomain
changetype: modify
add: uniquemember
uniquemember: cn=IDRWUser,cn=Users,dc=localdomain
[oracle@fusion bin]$ more rwg_member.ldif
dn: cn=orclFAGroupWritePrivilegeGroup,cn=Groups,dc=localdomain
changetype: modify
add: uniquemember
uniquemember: cn=IDRWUser,cn=Users,dc=localdomain
[oracle@fusion bin]$ more rwpg_member.ldif
dn: cn=orclFAUserWritePrefsPrivilegeGroup,cn=Groups,dc=localdomain
changetype: modify
add: uniquemember
uniquemember: cn=IDRWUser,cn=Users,dc=localdomain
[oracle@fusion bin]$ /app/fusion/fmw/idm/bin/ldapmodify -h fusion -p 3060 -D cn=orcladmin -q -f rog_member.ldif
Please enter bind password:
modifying entry cn=orclFAGroupReadPrivilegeGroup,cn=Groups,dc=localdomain
ldap_modify: Type or value exists
ldap_modify: additional info: uniquemember attribute has duplicate value.
Note: Ignore if you see above error. This confirms that the user was already added to ReadOnly group.
[oracle@fusion bin]$ /app/fusion/fmw/idm/bin/ldapmodify -h fusion -p 3060 -D cn=orcladmin -q -f rwu_member.ldif
Please enter bind password:
modifying entry cn=orclFAUserWritePrivilegeGroup,cn=Groups,dc=localdomain
[oracle@fusion bin]$ /app/fusion/fmw/idm/bin/ldapmodify -h fusion -p 3060 -D cn=orcladmin -q -f rwg_member.ldif
Please enter bind password:
modifying entry cn=orclFAGroupWritePrivilegeGroup,cn=Groups,dc=localdomain
[oracle@fusion bin]$ /app/fusion/fmw/idm/bin/ldapmodify -h fusion -p 3060 -D cn=orcladmin -q -f rwpg_member.ldif
Please enter bind password:
modifying entry cn=orclFAUserWritePrefsPrivilegeGroup,cn=Groups,dc=localdomain
Extending the Domain with Oracle Access Manager
[oracle@fusion bin]$ cd /app/fusion/fmw/oracle_common/common/bin/
[oracle@fusion bin]$ ./config.sh &

Click “Extend an existing WebLogic domain” and click Next
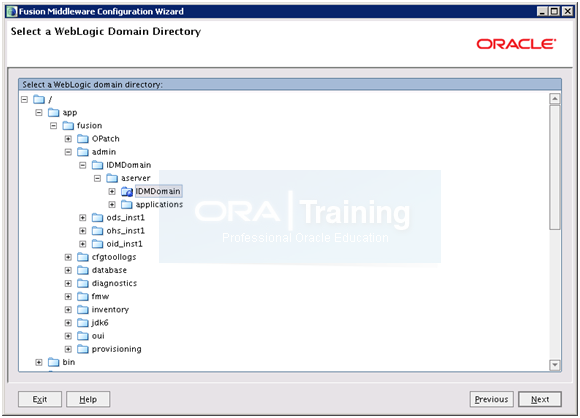
Scroll down and select admin->IDMDomain-> aserver -> IDMDomain. Click Next

Select only “Oracle Access Manager with Database Policy Store” and click on Next.
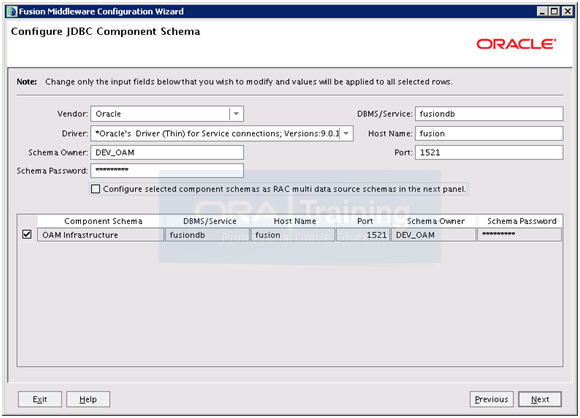
Here you need to provide the database connection details and choose schema owner username. You can keep the name default but make sure to keep a note of it since you will need this later. Choose a password for example Oracle123. Click Next
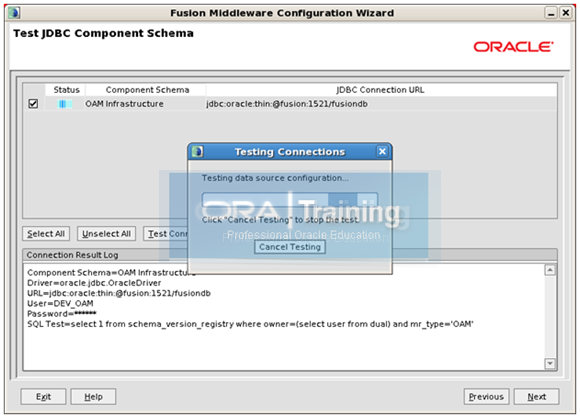
Now it will test the database connectivity through JDBC.
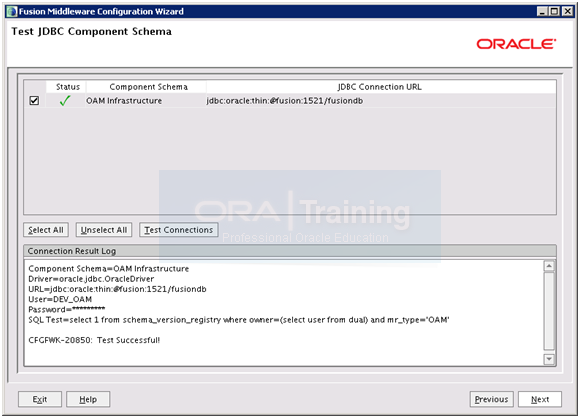
Once successful, click Next
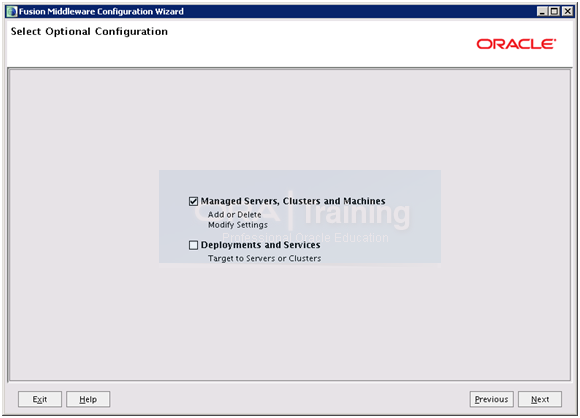
Select “Managed Servers, Clusters and Machines” only and click Next

The first row was from previous configuration of ODS and now there will be another row for OAM. Keep the default port and make a note of it. Enter wls_oam1 for the instance name (or whichever you chose while creating instance) and click Next
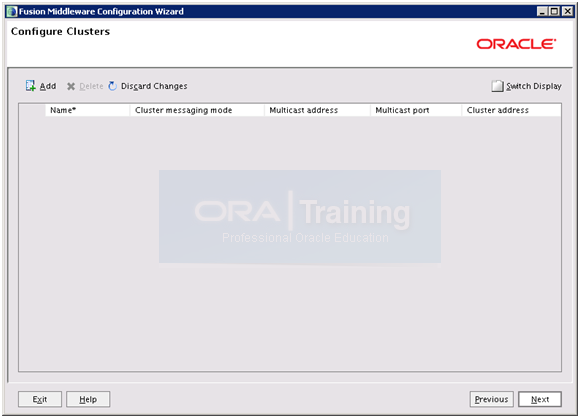
Just click Next
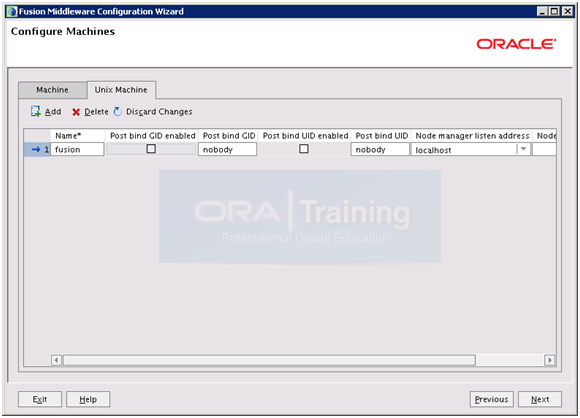
On the “Machines” tab make sure that correct hostname is entered. Click Next
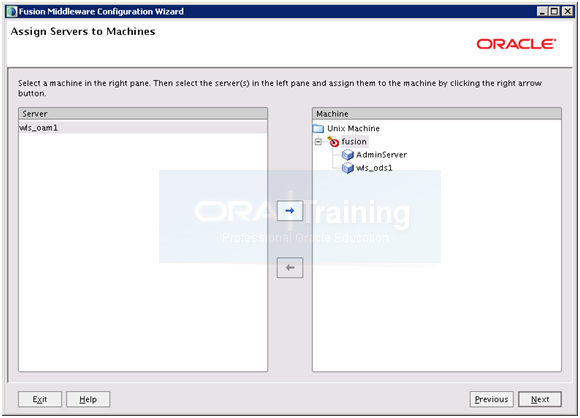
Select wls_oam1 and click the right arrow.
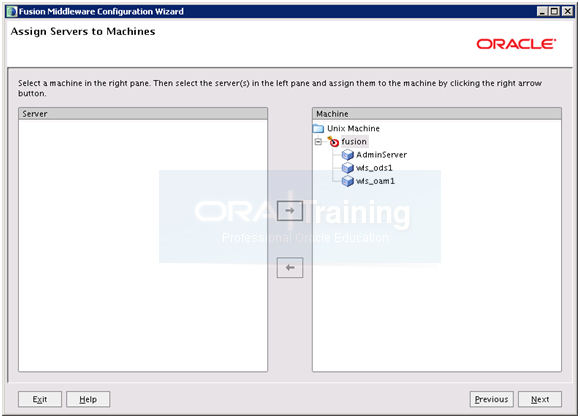
Now it should look as above. Click Next
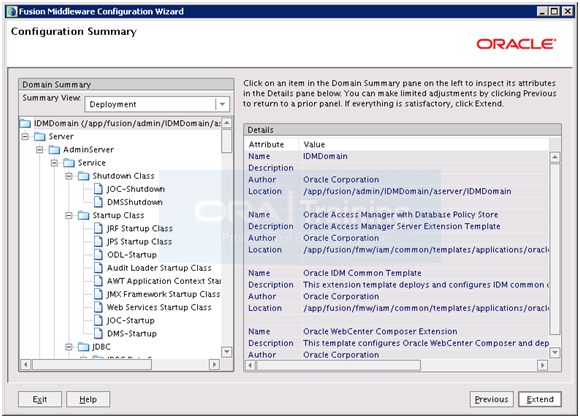
On the summary page Click Extend.
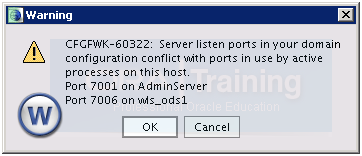
Click OK Since we are aware that these are correct ports being used by AdminServer and wls_ods1 instance.
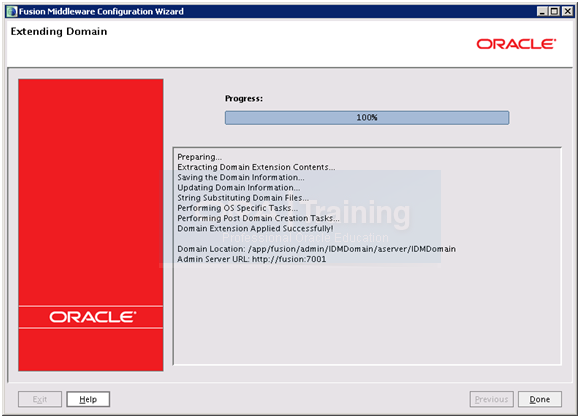
Once configuration finishes, click Done.
Restart Weblogic admin server. Do not start managed server wls_oam1 yet.
You can start the managed server by using following command.
[oracle@fusion bin]$ cd /app/fusion/admin/IDMDomain/aserver/IDMDomain/bin/
[oracle@fusion bin]$ ./startManagedWebLogic.sh wls_oam1
This will create the directory
/app/fusion/admin/IDMDomain/aserver/IDMDomain/servers/wls_oam1
Press CTRL+C to stop the process since we will need to configure startup without password prompt.
[oracle@fusion wls_oam1]$ cd /app/fusion/admin/IDMDomain/aserver/IDMDomain/servers/wls_oam1
[oracle@fusion wls_oam1]$ cp ../wls_ods1/security/ boot.properties .
Now we can start the managed server without prompting for password.
[oracle@fusion bin]$ cd /app/fusion/admin/IDMDomain/aserver/IDMDomain/bin/
[oracle@fusion bin]$ nohup ./startManagedWebLogic.sh wls_oam1 &
Remove IDM Domain Agent
Open Admin Server console at http://fusion:7777/console and login with user weblogic
Click Lock & Edit
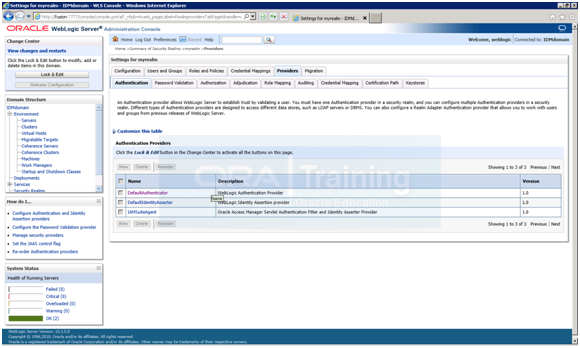
Go to Console->Environment -> Security Realms -> myrealm -> providers -> Select IAMSuiteAgent and delete it.
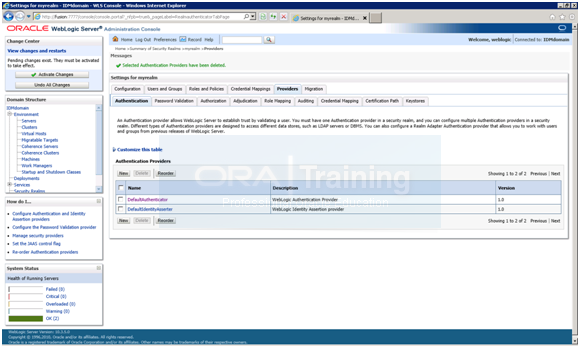
Restart Weblogic and all managed servers including wls_oam1
Configuring Oracle HTTP Servers to Display Login Page and Oracle Access Manager Console
Append following entries in /app/fusion/admin/ohs_inst1/config/OHS/ohs1/moduleconf/admin.conf
<Location /oam>
SetHandler weblogic-handler
WebLogicHost fusion
WebLogicPort 14100
</Location>
<Location /fusion_apps>
SetHandler weblogic-handler
WebLogicHost fusion
WebLogicPort 14100
</Location>
<Location /oamconsole>
SetHandler weblogic-handler
WebLogicHost fusion
WebLogicPort 7001
</Location>
Restart HTTP Server to bring this to effect.
Check http://fusion:7777/oamconsole to validate the same.
Configure OAM
[oracle@fusion bin]$ cd /app/fusion/fmw/iam/idmtools/bin
[oracle@fusion bin]$ more config_oam1.props
WLSHOST: fusion
WLSPORT: 7001
WLSADMIN: weblogic
IDSTORE_HOST: fusion
IDSTORE_PORT: 3060
IDSTORE_BINDDN: cn=orcladmin
IDSTORE_USERNAMEATTRIBUTE: cn
IDSTORE_LOGINATTRIBUTE: uid
IDSTORE_USERSEARCHBASE: cn=Users,dc=localdomain
IDSTORE_SEARCHBASE: dc=localdomain
IDSTORE_GROUPSEARCHBASE: cn=Groups,dc=localdomain
IDSTORE_OAMSOFTWAREUSER: oamLDAP
IDSTORE_OAMADMINUSER: oamadmin
PRIMARY_OAM_SERVERS: fusion:5575
WEBGATE_TYPE: ohsWebgate10g
ACCESS_GATE_ID: Webgate_IDM
OAM11G_IDM_DOMAIN_OHS_HOST:fusion
OAM11G_IDM_DOMAIN_OHS_PORT:7777
OAM11G_IDM_DOMAIN_OHS_PROTOCOL:http
OAM11G_OAM_SERVER_TRANSFER_MODE:open
OAM11G_IDM_DOMAIN_LOGOUT_URLS:/console/jsp/common/logout.jsp,/em/targetauth/emaslogout.jsp
OAM11G_WG_DENY_ON_NOT_PROTECTED: false
OAM11G_SERVER_LOGIN_ATTRIBUTE: uid
OAM_TRANSFER_MODE: open
COOKIE_DOMAIN: .localdomain
OAM11G_IDSTORE_ROLE_SECURITY_ADMIN: OAMAdministrators
OAM11G_SSO_ONLY_FLAG: true
OAM11G_OIM_INTEGRATION_REQ: false
OAM11G_IMPERSONATION_FLAG:true
OAM11G_SERVER_LBR_HOST:fusion
OAM11G_SERVER_LBR_PORT:7777
OAM11G_SERVER_LBR_PROTOCOL:http
OAM11G_OIM_WEBGATE_PASSWD: Oracle123
COOKIE_EXPIRY_INTERVAL: 120
[oracle@fusion bin]$ ./idmConfigTool.sh -configOAM input_file=config_oam1.props
Enter ID Store Bind DN password :
Enter User Password for WLSPASSWD:
Confirm User Password for WLSPASSWD:
Enter User Password for OAM11G_IDM_DOMAIN_WEBGATE_PASSWD:
Confirm User Password for OAM11G_IDM_DOMAIN_WEBGATE_PASSWD:
The passwords do not match. Please re-enter.
Enter User Password for OAM11G_IDM_DOMAIN_WEBGATE_PASSWD:
Confirm User Password for OAM11G_IDM_DOMAIN_WEBGATE_PASSWD:
Enter User Password for IDSTORE_PWD_OAMSOFTWAREUSER:
Confirm User Password for IDSTORE_PWD_OAMSOFTWAREUSER:
Enter User Password for IDSTORE_PWD_OAMADMINUSER:
Confirm User Password for IDSTORE_PWD_OAMADMINUSER:
…
The tool has completed its operation. Details have been logged to automation.log
Restart Admin server.
Validating the Configuration
Login with oamadmin at http://fusion:7777/oamconsole
oamadmin/Oracle123
System Configuration -> Access Manager Settings -> SSO Agents -> Double click on OAM Agents
click Search
Webgate_IDM should be displayed here
Updating Newly-Created Agent
Click the Agent Webgate_IDM.
Select Open from the Actions menu.
Update the following information:
Deny if not Protected: Deselect.
Set Max Connections to 4 for all of the Oracle Access Manager servers listed in the primary servers list.
Click Apply.
Click Policy Configuration tab.
Double Click IAMSuiteAgent under Host Identifiers.
Click + in the operations box.
Enter the following information:
Host Name: fusion
Port: 7777
Click Apply.
Changing the Login Attribute
Note: If you have applied the previous patches then following will be already set.
Log in to the oamconsole at:
http://fusion:7777/oamconsole
2. Click the System Configuration tab.
3. Expand Data Sources – User Identity Stores.
4. Click OIMIDStore.
5. Click Open.
Adding the oamadmin Account to Access System Administrators
12-16 Product Title/BookTitle as a Variable
6. Change Username attribute to uid.
7. Click Apply.
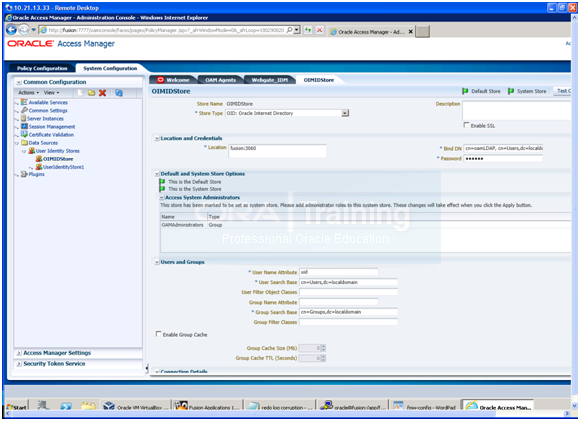
Restart the managed server wls_oam1
Add oamadmin as administrator
1. Log in to the oamconsole at:
http://fusion:7777/oamconsole
2. Click the System Configuration tab.
3. Expand Data Sources – User Identity Stores.
4. Click OIMIDStore.
5. Click Open.
6. Click the + symbol next to Access System Adminsitrators.
7. Type oamadmin in the search box and click Search.
8. Click the returned oamadmin row, then click Add Selected.
9. Click Apply.
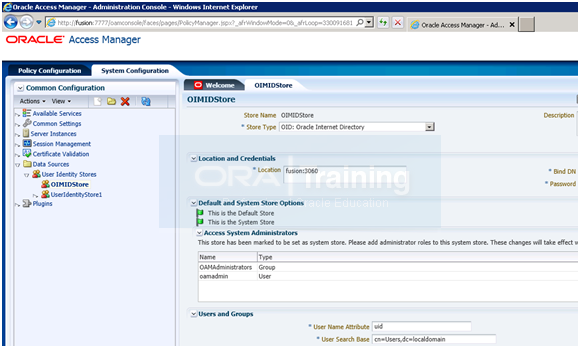
Validate OAM
[oracle@fusion tester]$ export JAVA_HOME=/app/fusion/jdk6
[oracle@fusion tester]$ cd /app/fusion/fmw/iam/oam/server/tester
[oracle@fusion tester]$ java -jar oamtest.jar
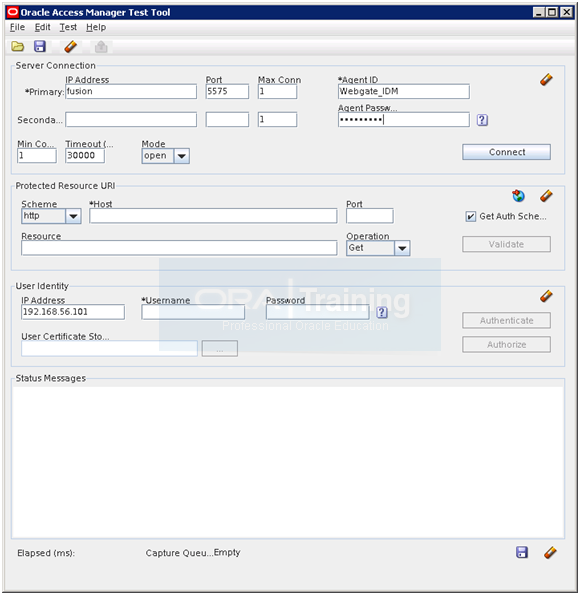
Enter following details click Connect
IP address: fusion
Port: 5575
Agent ID: Webgate_IDM
Agent Password: Oracle123
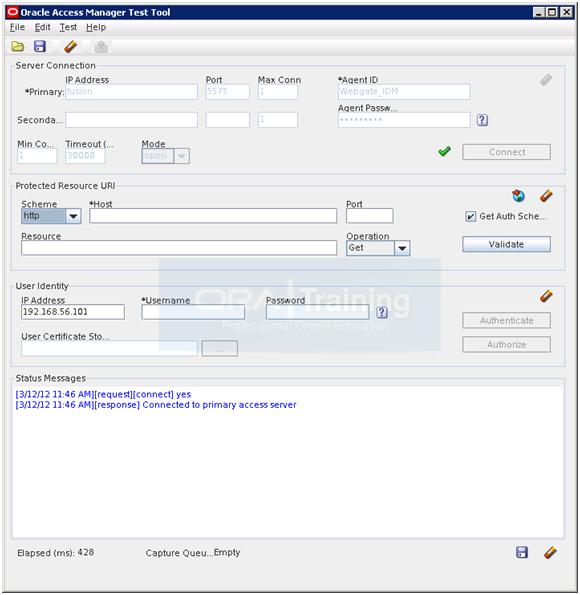
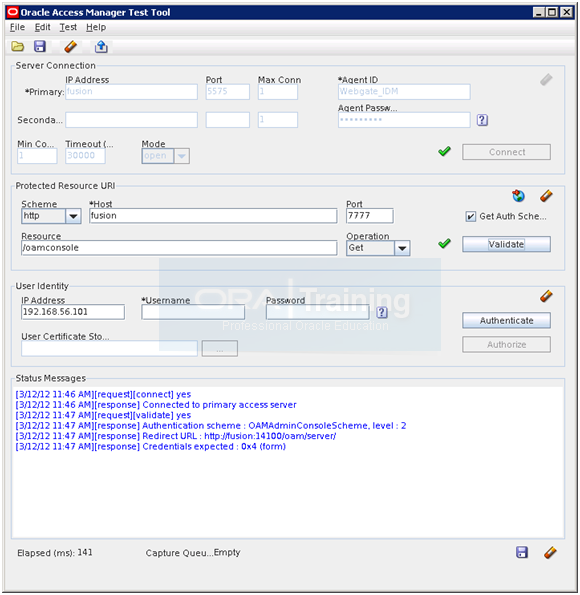
Enter following details in URI section and click Validate.
Scheme: http
Host: fusion
Port: 7777
Resource: /oamconsole
Operation: Get
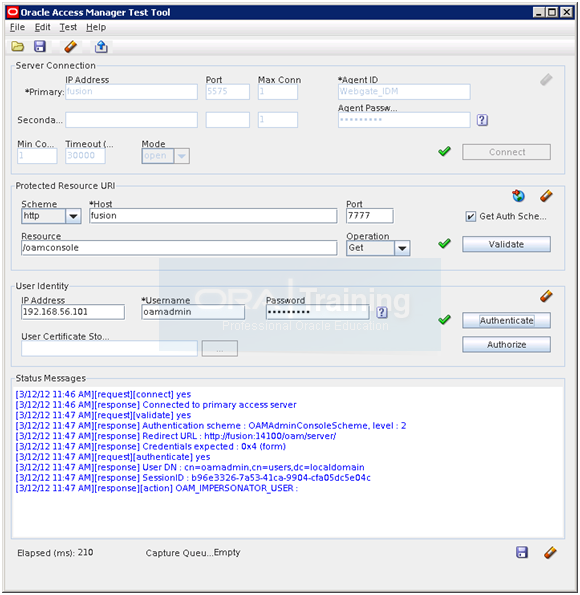
Enter following details and click Authorize.
IP address: IP for the host fusion (for our case 192.168.56.101 or fusion)
Username: oamadmin
Password: Oracle123

Click Authorize. It should succeed. This concludes OAM test.
Update the Configuration File oam-config.xml
Edit /app/fusion/admin/IDMDomain/aserver/IDMDomain/config/fmwconfig/oam-config.xml
as per post step for patch 12989739
<Setting Name=”NoUniqueSessionsFor10gAgents” Type=”xsd:boolean”>true</Setting>
…
<Setting Name=”SessionConfigurations” Type=”htf:map”>
<Setting Name=”Timeout” Type=”htf:timeInterval”>120M</Setting>
<Setting Name=”Expiry” Type=”htf:timeInterval”>120M</Setting>
<Setting Name=”MaxSessionsPerUser” Type=”xsd:integer”>400</Setting>
</Setting>
Extending the Domain to Configure Oracle Identity Manager and Oracle SOA Suite
Start the configuration from <Middleware Home/oracle_common/common/bin
[oracle@fusion fmwconfig]$ cd /app/fusion/fmw/oracle_common/common/bin/
[oracle@fusion bin]$ ./config.sh &
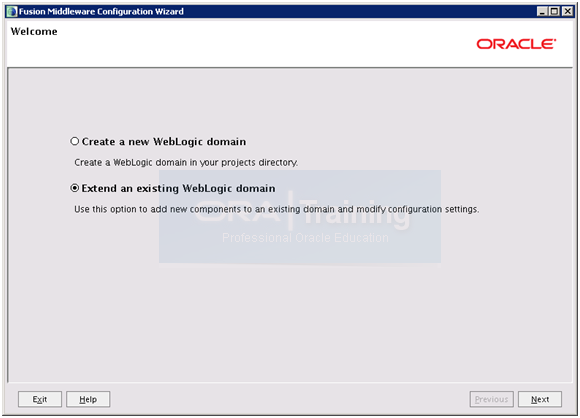
Select “Extend an existing WebLogic domain” and click Next
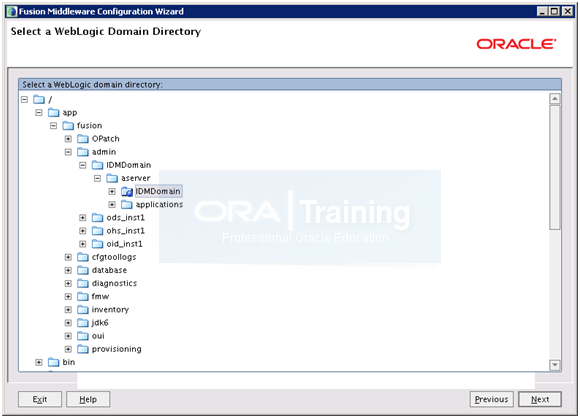
Scroll down and select admin->IDMDomain->aseever -> IDMDomain and click Next
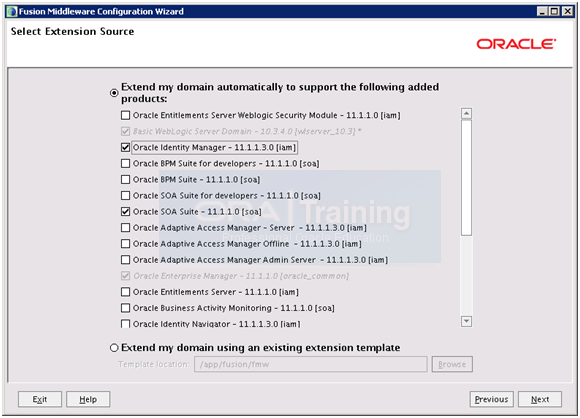
Select Oracle Identity Manager. It will automatically select Oracle SOA Suite and Oracle WSM. Click Next
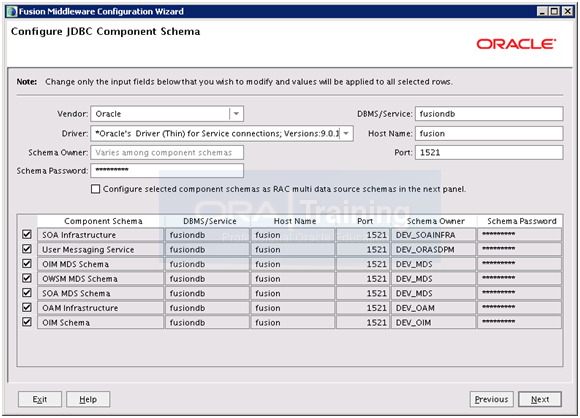
Check all to modify all entries together. Provide database connect details and password Oracle123 for all. Accept default value for Schema owner names. Click Next
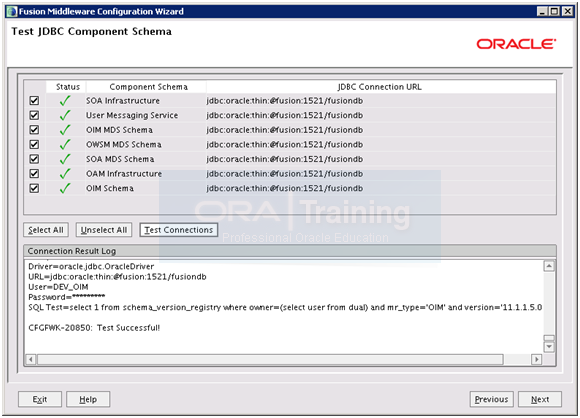
Now it will test the database connectivity through JDBC. Once JDBC test is successful, click Next
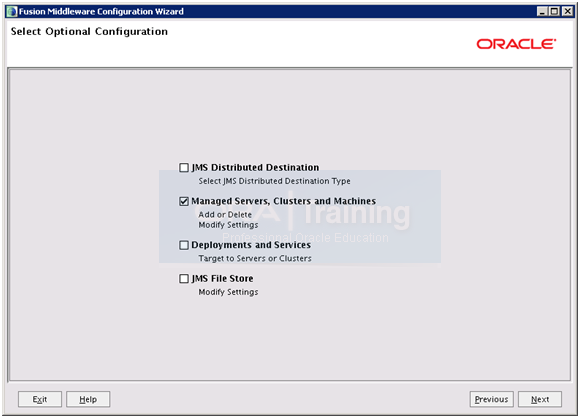
Select only “Managed Servers, Clusters and Machines” and click Next
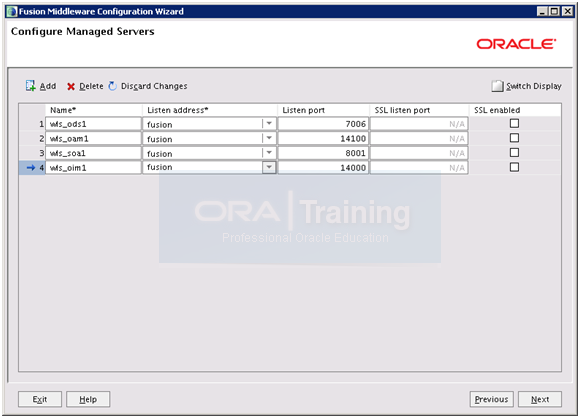
Add entries for wls_soa1 and wls_oim1. Note the ports and click Next.

Click Next
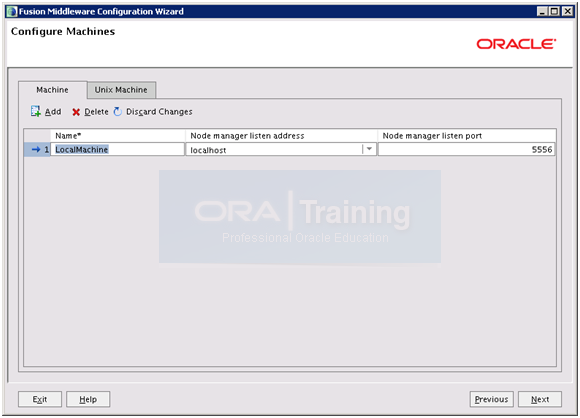
Since we are using Linux/Unix machine, delete entry from above screen.
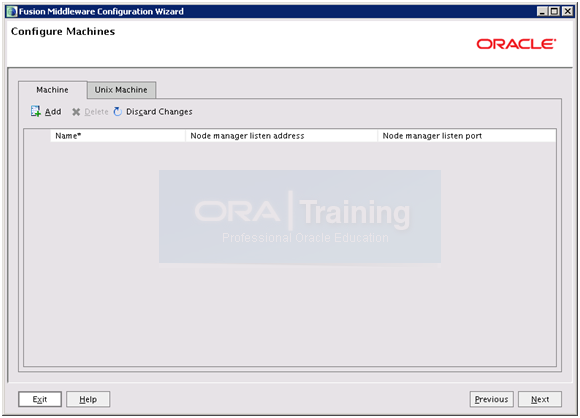
After Delete it should look as above. Click on Unix Machines tab
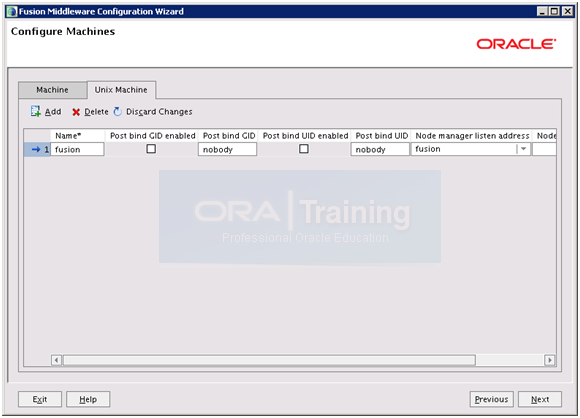
Make sure correct hostname is entered here. Click Next
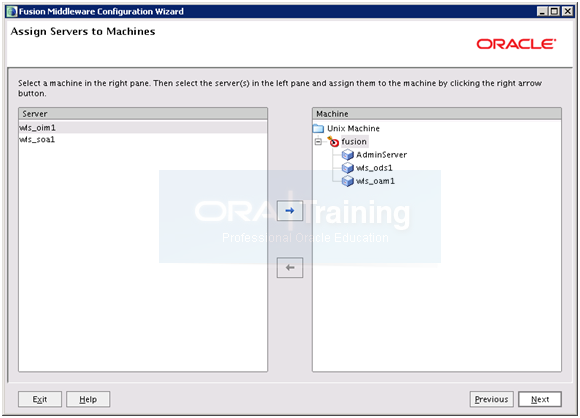
Select wls_oim1 andwls_soa1 and click right arrow.
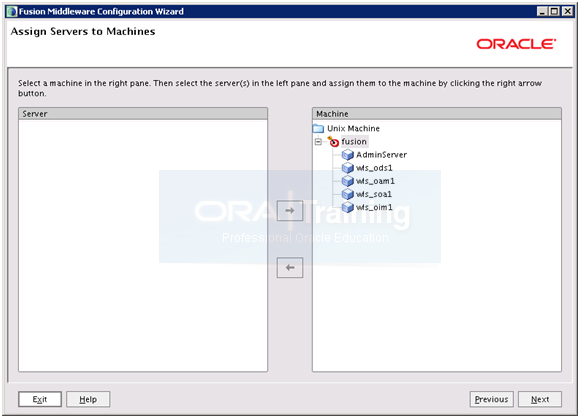
The screen will now look like above. Click Next
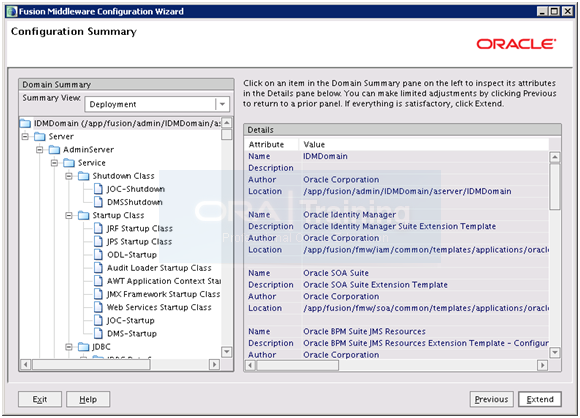
On Summary screen click Entend
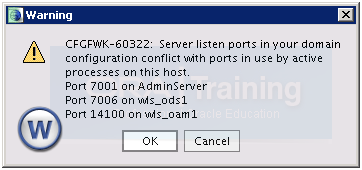
Click OK
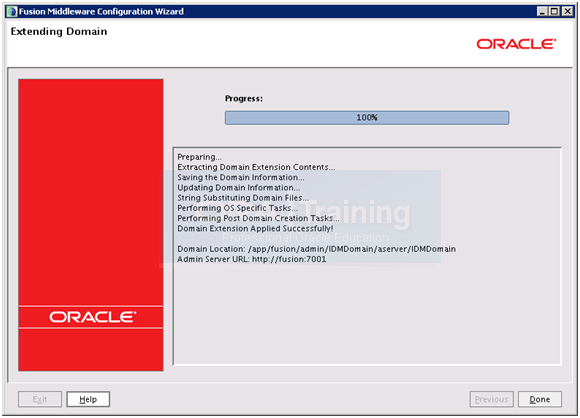
Once configuration finishes, click Done
Restart Weblogic Admin Server. Do not start OIM/SOA yet.
Note: Just in case if your database has case sensitive login enabled, make sure to disable it as follows. (default enabled in 11g)
SQL> alter system set sec_case_sensitive_logon=FALSE;
Configuring Oracle Identity Manager
Now we will configure the Identity Manager from <IAM Oracle Home>/bin
Before proceeding, ensure that the following are true:
1. The Administration Server is up and running.
2. The environment variables DOMAIN_HOME and WL_HOME are not set in the current shell.
[oracle@fusion bin]$ cd /app/fusion/fmw/iam/bin
[oracle@fusion bin]$ ./config.sh &

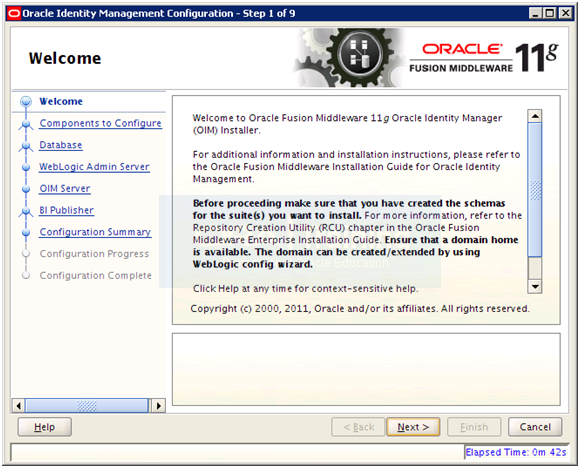
Click Next
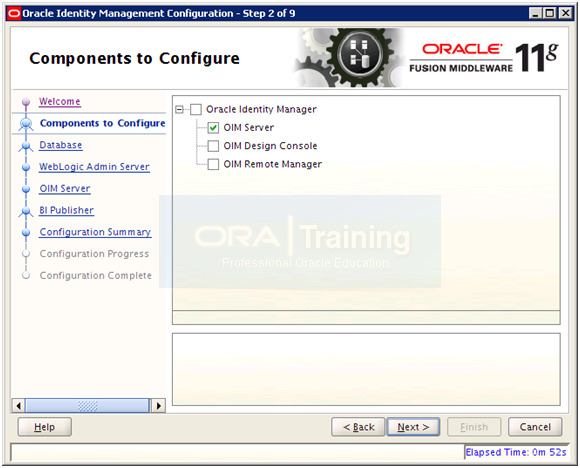
Select only OIM Server and click Next
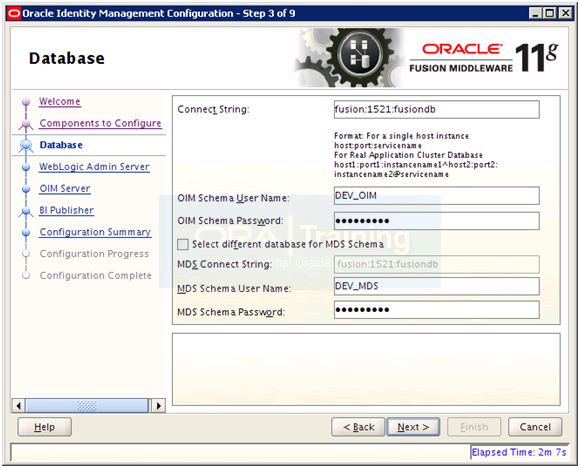
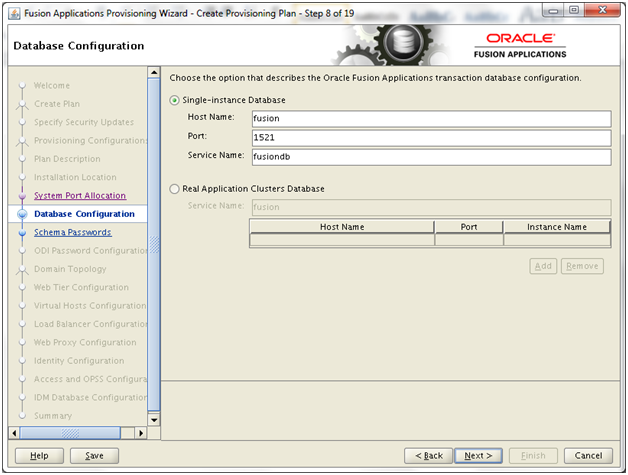
Enter database details in shown format “fusion:1521:fusiondb“. Select Schema names (keep default) and enter password (oracle123). Make sure to keep a note of these schema names DEV_OIM and DEV_MDS. We will need these later during provisioning plan. Click Next
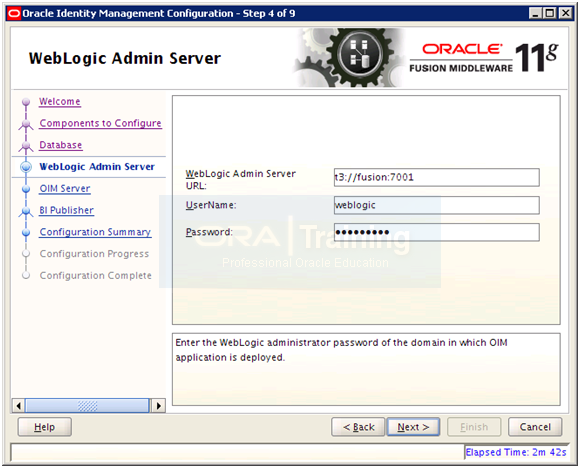
Enter AdminServer details in t3://<hostname>:<port> format. Here t3://fusion:7001
Important Note: Before clicking next make sure that AdminServer is running otherwise it may throw following error on next page. Start or restart AdminServer if you see this error.
INST-6180: Error while retrieving OIM Managed Server URL from the domain.
Click Next
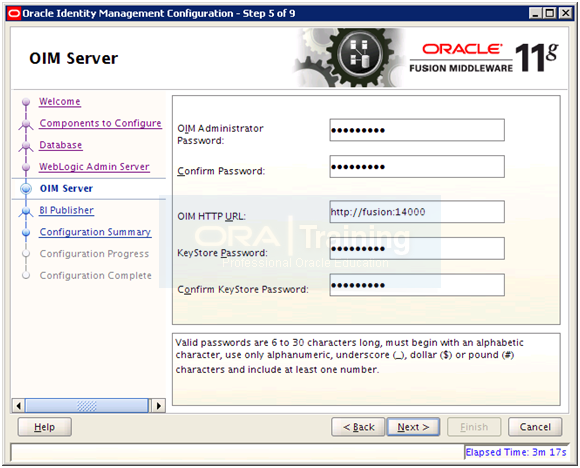
Enter passwords as follows and keep a note of them since we will require them in provisioning wizard.
OIM Admin password: Oracle123
Keystore Password: Oracle123
Enter OIM HTTP URL as http://fusion:14000 (based on port value in previous configuration step). Click Next
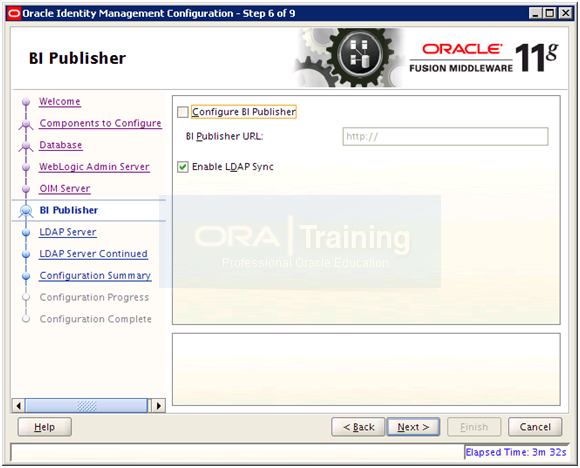
Deselect Configure BI Publisher and select Enable LDAP Sync. Click Next
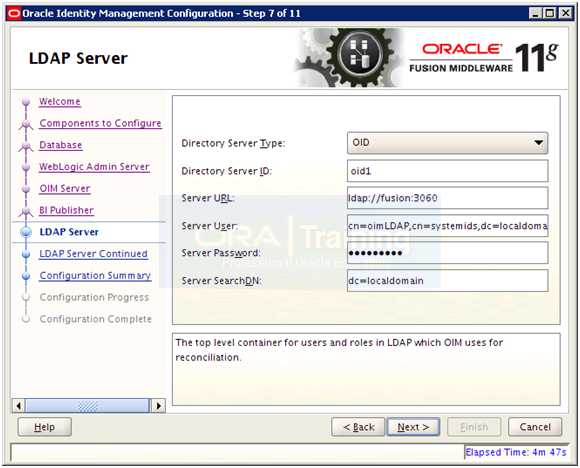
Enter details as follows and click Next
Directory type: OID
ID: oid1
URL: ldap://fusion:3060
Server User: cn=oimLDAP,cn=systemids,dc=localdomain
Server Password: Oracle123
Server SearchDN: dc=localdomain
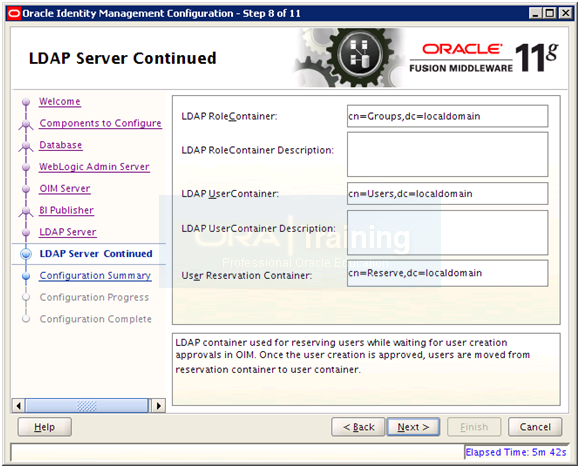
Enter details as follows and click Next.
Role Container: cn=Groups,dc=localdomain
User container: cn=Users,dc=localdomain
Reservation container: cn=Reserve,dc=localdomain
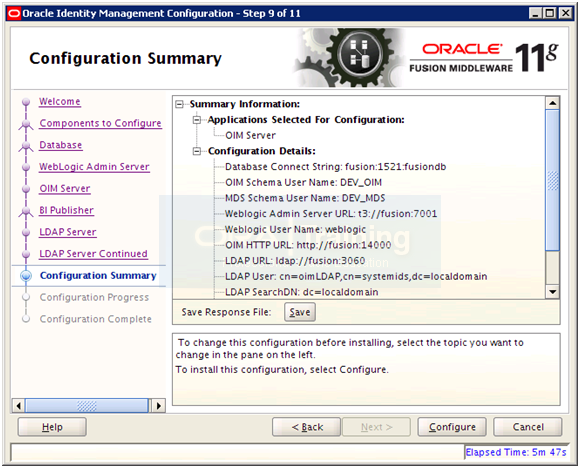
Save the summary if required and click Configure.
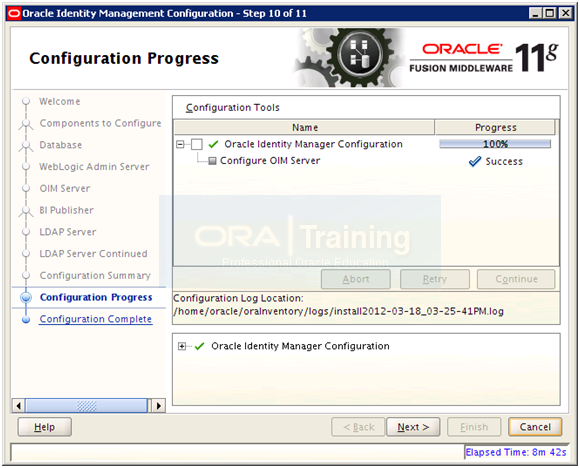
Once configuration finishes click Next
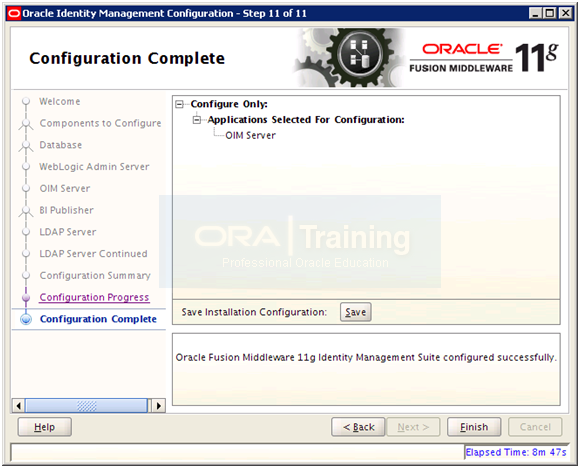
Save the configuration summary if needed and click Finish to complete the configuration.
Start wls_oim1 and wls_soa1 managed servers.
copy boot.properties
[oracle@fusion bin]$ cd /app/fusion/admin/IDMDomain/aserver/IDMDomain/servers/
[oracle@fusion servers]$ cp -p AdminServer/security/boot.properties wls_oim1/security/
[oracle@fusion servers]$ cp -p AdminServer/security/boot.properties wls_soa1/security/
Validate OIM by launching http://fusion:14000/oim
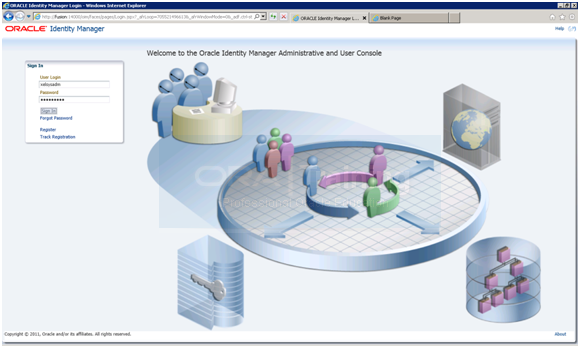
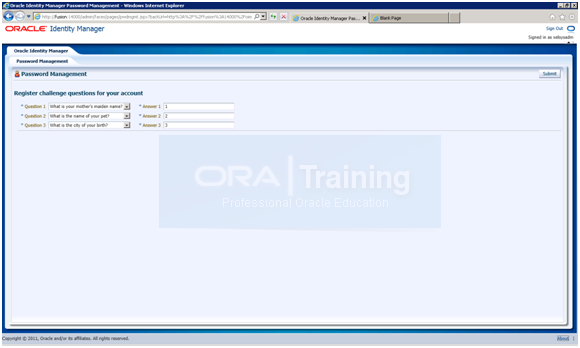
Now login with xelsysadm/Oralce123
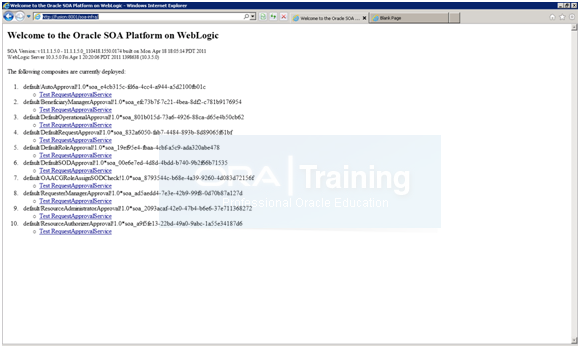
Now validate SOA by launching http://fusion:8001/soa-infra and login with weblogic/Oracle123
Apply patch 12790893. This is required patch for following steps to succeed.
Post steps for patch 12790893
Post Step-1
Edit weblogic.profile file
[oracle@fusion bin]$ cd /app/fusion/fmw/iam/server/bin
[oracle@fusion bin]$ cat weblogic.profile
# Please fill the information below before running the post-patch script.
# Put the OIM DB schema owner name here
operationsDB.user=DEV_OIM
# Put the DB driver to be used
operationsDB.driver=oracle.jdbc.xa.client.OracleXADataSource
# Put the absolute path to the Weblogic server directory here.
weblogic.server.dir=/app/fusion/fmw/wlserver_10.3
# The host on which OIM db is running
operationsDB.host=fusion
# The service name of the OIM db [Do not mention the SID here.]
operationsDB.serviceName=fusiondb
# The port of the OIM db
operationsDB.port=1521
# Application server
appserver.type=wls
[oracle@fusion bin]$ export JAVA_HOME=/app/fusion/jdk6
[oracle@fusion bin]$ export WL_HOME=/app/fusion/fmw/wlserver_10.3
[oracle@fusion bin]$ export OIM_ORACLE_HOME=/app/fusion/fmw/iam
[oracle@fusion bin]$ export ANT_HOME=/app/fusion/fmw/modules/org.apache.ant_1.7.1
[oracle@fusion bin]$ ./patch_weblogic.sh Oracle123
Buildfile: /app/fusion/fmw/iam/server/setup/deploy-files/setup.xml
[input]Enter the oim db password:
Buildfile: /app/fusion/fmw/iam/server/setup/deploy-files/setup.xml
Post Step-2
[oracle@fusion bin]$ mkdir $ORACLE_HOME/temp/log
[oracle@fusion bin]$ cp -p ~/patches/12790893/files/temp/RequestTemplateManagementPolicies.xml /app/fusion/fmw/iam/temp/
[oracle@fusion bin]$ cd $OIM_ORACLE_HOME/server/setup/deploy-files
[oracle@fusion deploy-files]$ /app/fusion/fmw/modules/org.apache.ant_1.7.1/bin/ant -f setup.xml \
upgrade-oes-ootb-policies -DoperationsDB.user=DEV_OIM -DOIM.DBPassword=Oracle123 \
-DoperationsDB.driver=oracle.jdbc.xa.client.OracleXADataSource -DoperationsDB.host=fusion \
-DoperationsDB.port=1521 -DoperationsDB.SID=fusiondb -Dpolicy.dir=/app/fusion/fmw/iam/temp \
-Dupdate.flag=true -Dweblogic.server.dir=/app/fusion/fmw/wlserver_10.3
Buildfile: setup.xml
upgrade-oes-ootb-policies:
upgrade-oes-ootb-policies:
[echo] —-> UPDATING OUT OF THE BOX OES POLICIES
[java] [EL Info]: 2012-03-19 09:13:59.734–ServerSession(140283754)–EclipseLink, version: Eclipse Persistence Services – 1.1.0.r3634
[java] [EL Info]: 2012-03-19 09:14:06.151–ServerSession(140283754)–file:/app/fusion/fmw/iam/modules/oracle.oes_11.1.1/jps-internal.jar-JpsDBDataManager login successful
[echo] —-> SEEDING COMPLETE LOG FILE
[echo] —-> LOG FILE : /app/fusion/fmw/iam/temp/log
BUILD SUCCESSFUL
Total time: 52 seconds
Post Step-3
cd PATCH_TOP/12790893/files/server/db/oim/oracle/
Connect to the db as OIM_db_user
SQL> @Upgrade/oim11gps1_dml_insert_pty_FAAdministratorsRole.sql
SQL> @Upgrade/oim11gps1_dml_insert_pty_cookie-http-only-flag-turned-on.sql
SQL> @Upgrade/oim11gps1_dml_update_AllowDisabledManagers.sql
SQL> @Upgrade/oim11gps1_dml_create_UMS_ITRes_def_instance.sql
SQL> @StoredProcedures/API/oim_usr_mgmt_pkg_body.sql
SQL> @StoredProcedures/Recon/OIM_SP_ReconBlkRoleCRU.sql
SQL> @StoredProcedures/Recon/XL_SP_ReconBlkChildMthAcntCRUD.sql
SQL> @StoredProcedures/Recon/XL_SP_ReconBlkRoleMemValMatch.sql
SQL> @StoredProcedures/Recon/XL_SP_ReconRoleMemValMatch.sql
Post-step 4:
Deploy OAACGRoleAssignSODCheck composite with a deployment plan to SOA server.
a) Login to EM and select/click on OAACGRoleAssignSODCheck [1.0] composite on the home page
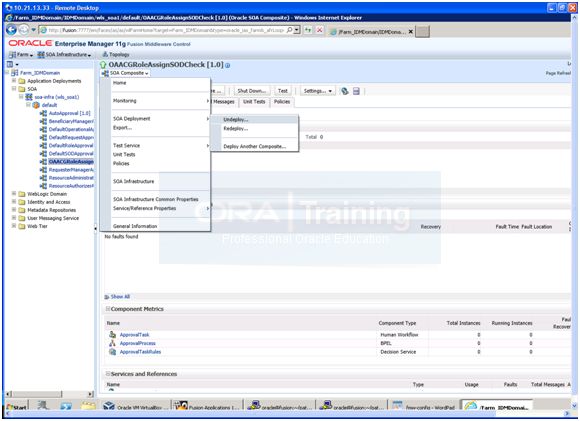
b) From top menu, select SOA Composite->SOA Deployment->Undeploy and then click on Undeploy in step2
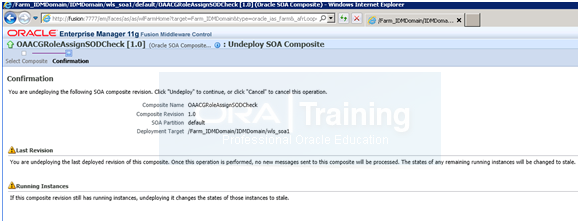
Note: If it waits forever, just close the window and proceed to next step.
c) Unzip OAACGRoleAssignSODCheck.zip in <OIM_ORACLE_HOME>/server/workflows/composites to a temporary location, lets say /tmp
[oracle@fusion tmp]$ cd /tmp
[oracle@fusion tmp]$ unzip /app/fusion/fmw/iam/server/workflows/composites/OAACGRoleAssignSODCheck.zip OAACGRoleAssignSODCheck/deploy/sca_OAACGRoleAssignSODCheck_rev1.0.jar
Archive: /app/fusion/fmw/iam/server/workflows/composites/OAACGRoleAssignSODCheck.zip
inflating: OAACGRoleAssignSODCheck/deploy/sca_OAACGRoleAssignSODCheck_rev1.0.jar
c) Get sca_OAACGRoleAssignSODCheck_rev1.0.jar from /tmp/OAACGRoleAssignSODCheck/deploy folder
d) Open the jar file and extract soaconfigplan.xml file
e) Open the soaconfigplan.xml file and replace the following @oimT3URL, (oimServerHost,)oimServerPort with appropriate values
f) Put the updated soaconfigplan.xml back into sca_OAACGRoleAssignSODCheck_rev1.0.jar file and copy this jar to <WLS_DOMAIN_HOME>/soa/autodeploy
folder
g) Restart SOA server
Post-step 5: Start the OIM server
Post step 6: Use em to update OAACgConfig ResponseTimeoutvalue from 300 secs to 240
a) Login to em as admin user
b) select OIM server
c) From the top pull down menu, select Weblogic Server–>System Mbean Browser
d) Go to Application Defined Mbeans and navigate oracle.iam->oim_server1>oim>XMLConfig>Config->XMLConfig.OAACGConfig
e) Select OAACGConfig and in the Attributes, change ResponseTimeoutvalue form 300 to 240
We skipped post steps 7, 8 and 9 for now since our aim at the moment is to complete fusion installation and show the look and feel.
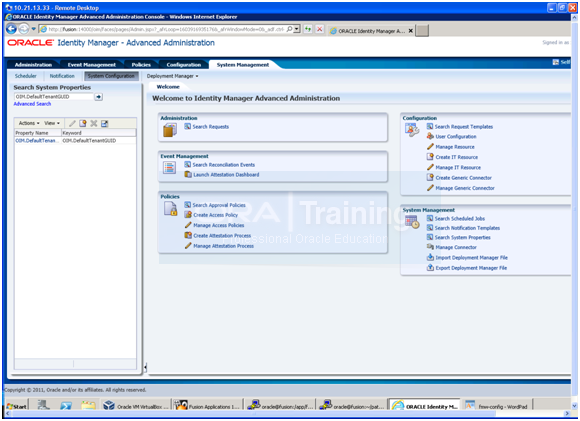
Post-step 10: Steps to enable default TenantGUID value for callbacks payload:
1. Login in OIM UI as xelsysadm user. Click on ‘Advanced’ on the top right.
2. Click on ‘System Management’ tab available on the top.
3. Click on ‘System Configuration’ subtab.
4. Click on Actions ->Create a New OIM System Property.
5. Provide Property Name: OIM.DefaultTenantGUID
6. Provide Keyword: OIM.DefaultTenantGUID
7. Provide Value: 1.
8. Click Perform.

Post-step 11: Restart OIM Server
Configuring Oracle Identity Manager to Reconcile from ID Store
[oracle@fusion ldap_config_util]$ cd /app/fusion/fmw/iam/server/ldap_config_util
[oracle@fusion ldap_config_util]$ more ldapconfig.props
# OIMServer Type, Valid values can be WLS, JBOSS, WAS
# e.g.: OIMServerType=WLS
OIMServerType=WLS
# OIMAdmin User Login
# e.g.: OIMAdminUser=xelsysadm
OIMAdminUser=xelsysadm
# Skip Validation of OVD Schema
# e.g.: SkipOVDValidation=true|false, Default false
SkipOVDValidation=true
# OIM Provider URL
# e.g.: OIMProviderURL=t3://localhost:8003
OIMProviderURL=t3://fusion:14000
# OID URL
# e.g.: OIDURL=ldap://localhost:389
OIDURL=ldap://fusion:3060
# Admin user name to connect to OID
# e.g.: OIDAdminUsername=cn=orcladmin
OIDAdminUsername=cn=orcladmin
# Search base
# e.g.: OIDSearchBase=dc=company,dc=com
OIDSearchBase=dc=localdomain
# Name of the user container
# e.g.: UserContainerName=cn=Users
UserContainerName=cn=Users
# Name of the role container
# e.g.: RoleContainerName=cn=Roles
RoleContainerName=cn=Groups
# Name of the reservation container
# e.g.: ReservationContainerName=cn=Reserve
ReservationContainerName=cn=Reserve
[oracle@fusion ldap_config_util]$ ./LDAPConfigPostSetup.sh
[Enter OID admin password:]
[Enter OIM admin password:]
Successfully Enabled Changelog based Reconciliation schedule jobs
Configuring Oracle HTTP Servers for Oracle Identity Manager and SOA
Append following entries in /app/fusion/admin/ohs_inst1/config/OHS/ohs1/moduleconf/admin.conf
# oim admin console(idmshell based)
<Location /admin>
SetHandler weblogic-handler
WLProxySSL OFF
WLProxySSLPassThrough OFF
WLCookieName oimjsessionid
WebLogicHost fusion
WebLogicPort 14000
WLLogFile “${ORACLE_INSTANCE}/diagnostics/logs/mod_wl/oim_component.log”
</Location>
# oim self and advanced admin webapp consoles(canonic webapp)
<Location /oim>
SetHandler weblogic-handler
WLProxySSL OFF
WLProxySSLPassThrough OFF
WLCookieName oimjsessionid
WebLogicHost fusion
WebLogicPort 14000
WLLogFile “${ORACLE_INSTANCE}/diagnostics/logs/mod_wl/oim_component.log”
</Location>
# SOA Callback webservice for SOD – Provide the SOA Managed Server Ports
<Location /sodcheck>
SetHandler weblogic-handler
WLProxySSL OFF
WLProxySSLPassThrough OFF
WLCookieName oimjsessionid
WebLogicHost fusion
WebLogicPort 8001
WLLogFile “${ORACLE_INSTANCE}/diagnostics/logs/mod_wl/oim_component.log”
</Location>
# Callback webservice for SOA. SOA calls this when a request is approved/rejected
# Provide the SOA Managed Server Port
<Location /workflowservice>
SetHandler weblogic-handler
WLProxySSL OFF
WLProxySSLPassThrough OFF
WLCookieName oimjsessionid
WebLogicHost fusion
WebLogicPort 14000
WLLogFile “${ORACLE_INSTANCE}/diagnostics/logs/mod_wl/oim_component.log”
</Location>
# xlWebApp – Legacy 9.x webapp (struts based)
<Location /xlWebApp>
SetHandler weblogic-handler
WLProxySSL OFF
WLProxySSLPassThrough OFF
WLCookieName oimjsessionid
WebLogicHost fusion
WebLogicPort 14000
WLLogFile “${ORACLE_INSTANCE}/diagnostics/logs/mod_wl/oim_component.log”
</Location>
# Nexaweb WebApp – used for workflow designer and DM
<Location /Nexaweb>
SetHandler weblogic-handler
WLProxySSL OFF
WLProxySSLPassThrough OFF
WLCookieName oimjsessionid
WebLogicHost fusion
WebLogicPort 14000
WLLogFile “${ORACLE_INSTANCE}/diagnostics/logs/mod_wl/oim_component.log”
</Location>
# used for FA Callback service.
<Location /callbackResponseService>
SetHandler weblogic-handler
WLProxySSL OFF
WLProxySSLPassThrough OFF
WLCookieName oimjsessionid
WebLogicHost fusion
WebLogicPort 14000
WLLogFile “${ORACLE_INSTANCE}/diagnostics/logs/mod_wl/oim_component.log”
</Location>
# spml xsd profile
<Location /spml-xsd>
SetHandler weblogic-handler
WLProxySSL OFF
WLProxySSLPassThrough OFF
WLCookieName oimjsessionid
WebLogicHost fusion
WebLogicPort 14000
WLLogFile “${ORACLE_INSTANCE}/diagnostics/logs/mod_wl/oim_component.log”
</Location>
<Location /HTTPClnt>
SetHandler weblogic-handler
WLProxySSL OFF
WLProxySSLPassThrough OFF
WLCookieName oimjsessionid
WebLogicHost fusion
WebLogicPort 14000
WLLogFile “${ORACLE_INSTANCE}/diagnostics/logs/mod_wl/oim_component.log”
</Location>
Restart HTTP Server to bring this to effect.
Validate http://fusion:7777/oim with xelsysadm user
Now login to Weblogic Console at http://fusion:7777/console
Click Lock and Edit. Select Servers->wls_soa1. In the protocols tab click on HTTP and change the following values. Now click on Activate changes.

Restart managed server wls_soa1
Enabling Oracle Identity Manager to Connect to SOA Using the Administrative Users Provisioned in LDAP
Perform the following postinstallation steps to enable Oracle Identity Manager to work with the Oracle WebLogic Server administrator user provisioned in the central LDAP store. This enables Oracle Identity Manager to connect to SOA without any problem:
1. Log in to Enterprise Manager at: http://fusion:7777/em
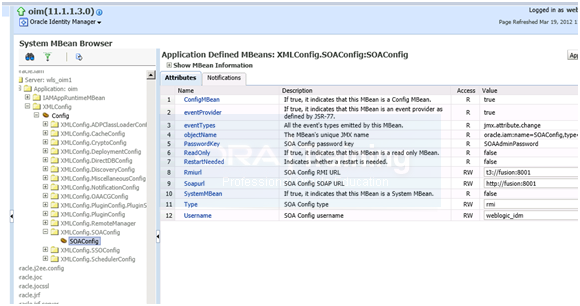
2. Right click Identity and Access –OIM–oim(11.1.1.3.0) and select System Mbean Browser.
3. Select Application–defined Mbeans –> oracle.iam–Server: wls_oim1 –> Application:
oim–> XML Config–> Config–XMLConfig.SOAConfig –> SOAConfig
4. View the username attribute. By default, the value of this attribute is weblogic. Change this to the Oracle WebLogic Server administrator username weblogic_idm
5. Click Apply.


6. Select Weblogic Domain–IDM Domain from the Navigator.
7. Select Security–Credentials from the down menu.
8. Expand the key oim.
9. Click SOAAdminPassword.
10. Click Edit.
11. Change the username to weblogic_idm and set the password to the accounts password.
12. Click OK.
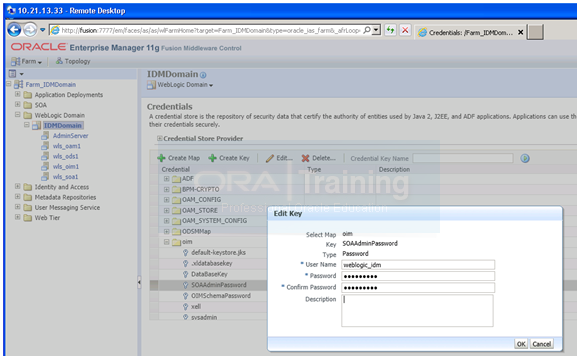
13. Run the reconciliation process to enable the Oracle WebLogic Server administrator,
weblogic_idm, to be visible in the OIM Console. Follow these steps:
a. Log in to Oracle Identity Manager at:
https://fusion:7777/oim as the user xelsysadm.
b. Click Advanced.
c. Click the System Management tab
d. Click the arrow for the Search Scheduler to list all the schedulers.
e. Select LDAP User Create and Update Full Reconciliation.
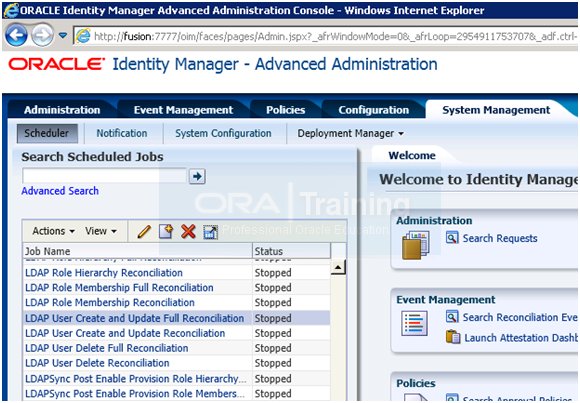
f. Click Actions->Run now to run the job.

Go to the Administration page and perform a search to verify that the user is visible in the Oracle Identity Manager console.
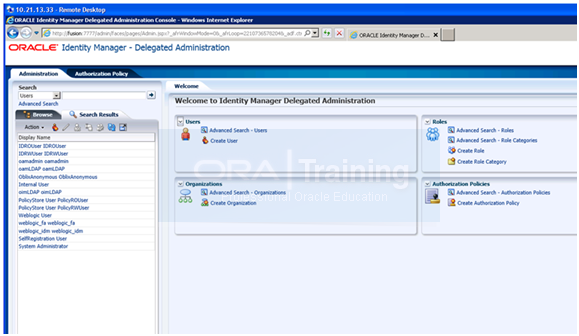
14. Select Administration.
15. Click Advanced Search–Roles
16. Search for the Administrators role.
17. Click the Administrators Role.
18. Click Open.
19. Click the Member tab.
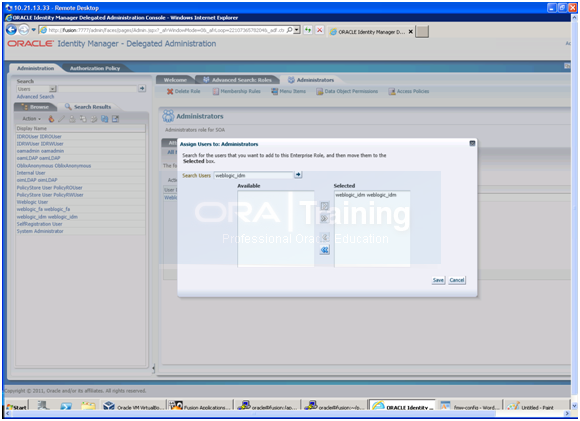
20. Click Assign.
21. Type weblogic_idm in the Search box and Click ->.
22. Select weblogic_idm from the list of available users.
23. Click > to move to Selected Users.
24. Click Save.
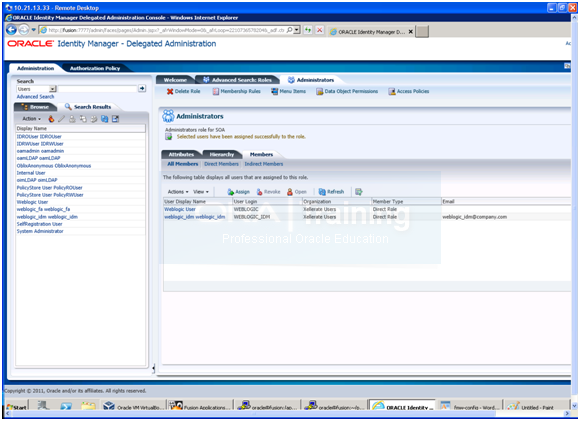
25. Restart Oracle Identity Manager managed server.
Update Oracle Identity Manager JMS Queues
Update Oracle Identity Manager JMS queues as follows:
1. Log in to the WebLogic console as the administrative user.
2. Select Services – Messaging – JMS Modules from the Domain Structure menu.
3. Click OIMJMSModule.
4. Click Lock & Edit.
5. For each of the queues, click the queue then click the Delivery Failure tab and change Redelivery Limit value from -1 to 1, then click Save.
6. Make sure you have performed Steps 4 and 5 for all the queues under OIMJMSModule.
7. Click Activate Changes.
8. Restart Oracle Identity Manager server
This concludes the configuration of Oracle Identity and Access Management components. Next is very important step to integrate OIM and OAM.
Next: Integrate Oracle Identity Manager (OIM) and Oracle Access Manager (OAM)
Installing Oracle Fusion Applications – steps
- Installing Fusion Applications Provisioning Framework
- Installing Oracle 11g Database (Applications Transactional Database)
- Running Oracle Fusion Applications Repository Creation Utility (Applications RCU)
- Creating another database for Oracle Identity Management Infrastructure (optional)
- Running Repository Creation Utility (RCU) for Oracle Identity Management components
- Installing Oracle Identity and Access Management Components
- Configuring Oracle Identity and Access Management components
- Integrate Oracle Identity Manager (OIM) and Oracle Access Manager (OAM)
- Creating a New Provisioning Plan
- Provisioning an Applications Environment








Recent Comments